Education
Business
Consumer

Education

How a South Carolina District Swapped Discontinued Displays for ViewSonic ViewBoard Interactive Displays

SOLUTION BRIEF

How a South Carolina District Swapped Discontinued Displays for ViewSonic ViewBoard Interactive Displays

line drawing of a circular mazeline drawing of a circular maze
  • A school district needed a replacement for its 500 interactive displays that had started failing.


“The myViewBoard® ecosystem changed how educators teach. Instead of being left idle, digital whiteboarding tools and the ability to import lesson plans meant that ViewSonic displays saw daily usage during lessons.”


CHALLENGE

This South Carolina district invested in roughly 500 interactive displays from a previous vendor in 2021 and 2022, expecting them to last five years under warranty. Instead, the hardware started failing rapidly in year three.

To make matters worse, the vendor exited the interactive display market entirely, leaving the technology director with no official path for repairs or replacements.

IT admins had to convince the school board to reinvest in a dependable district-wide replacement much sooner than planned.

The district turned to its integration partner, which recommended the ViewSonic® ViewBoard® IFP50 and IFP51 series of interactive displays as the most cost-effective and reliable answer.

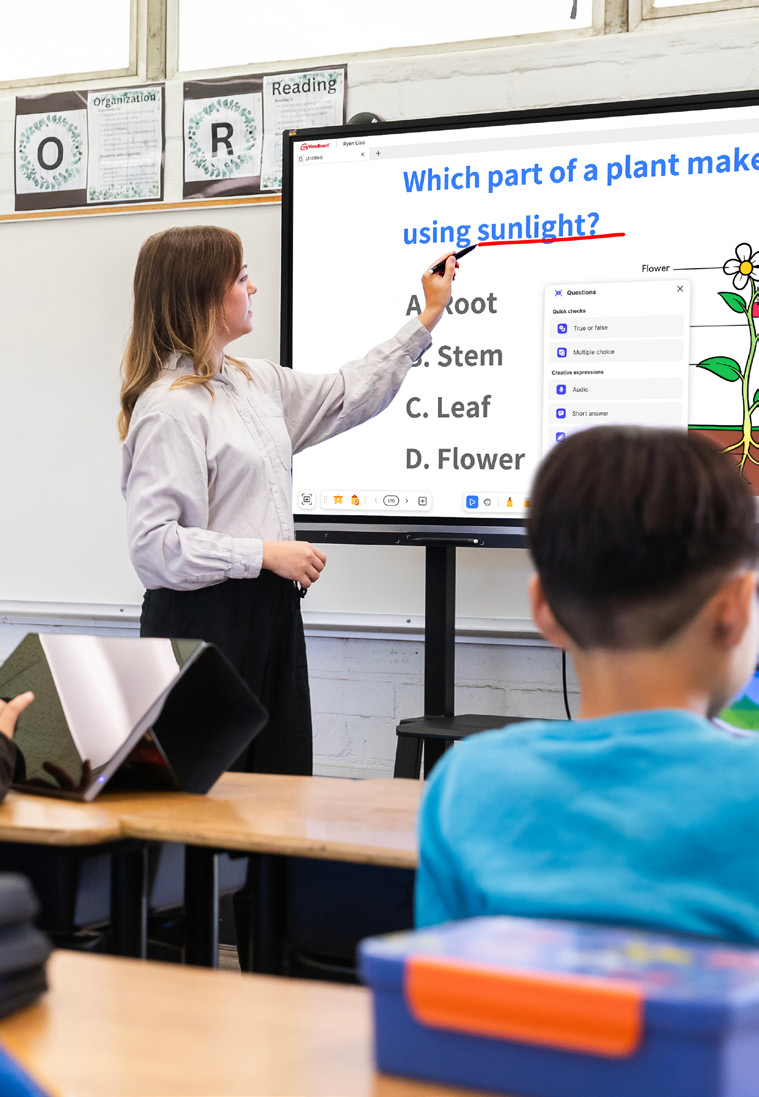
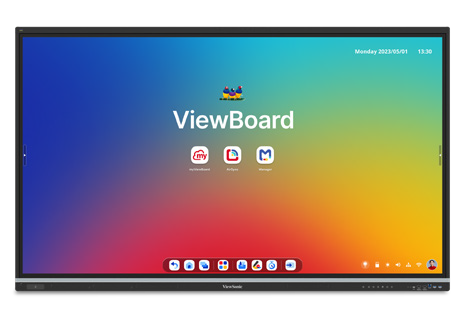
The IFP50 and IFP51 series both feature a stunning 4K touchscreen and access to ViewSonic’s award-winning myViewBoard software. The IFP51 series goes a step further with Android™ EDLA certification, unlocking verified Play Store access and a wider range of Google Mobile Services-compatible apps for teachers to bring into the classroom.

Because the district was reinvesting early, the evaluation focused on two requirements: the new setup had to be budget-friendly, and it had to last.

Several neighboring districts were already using ViewSonic solutions through the same partner. After a trial run and on-site demos, the district decided to move forward with ViewSonic

What ViewSonic Solution Did the District Deploy?

The district’s integration partner had a strong track record of placing ViewSonic hardware across South Carolina, making it a natural choice to replace the failing displays.

Success stories from nearby schools helped reassure the board during the evaluation process.

The district deployed a complete hardware and software package:

  • 445 75” ViewBoard® IFP50 4K interactive displays, including 210 IFP7550 models and 235 IFP7551 models.
  • ViewSonic Manager Advanced™ software with a 7-year license, one per display.
  • A 7-year ViewSonic® extended limited warranty that protects the entire investment.

The rollout spanned two generations of ViewSonic’s ViewBoard interactive displays. The district began in 2025 with the IFP7550. When that model reached end-of-life the following year, the district moved to its successor, the IFP7551, for the remaining displays.

ViewSonic honored the original pricing on its newer models, so the district was able to finish its rollout without going over budget.

Why Did the District Choose ViewSonic Over the Incumbent Platform?

Price and reliability drove the decision, but the 7-year warranty sealed the deal. After watching its previous fleet break down early with zero manufacturer support, the district wanted a partner that would stand behind its hardware.

That warranty proved reliability as much as it offered peace of mind.

Software made a big difference too. Teachers found the old displays clunky, often using them as nothing more than glorified projectors. The myViewBoard® ecosystem changed how educators teach. Instead of being left idle, digital whiteboarding tools and the ability to import lesson plans meant that ViewSonic displays saw daily usage during lessons.

What Results Has the District Seen?

  • 445 ViewBoard displays were deployed to replace the failing incumbent fleet, starting with 210 IFP7550 units in June 2025 followed by 235 IFP7551 units.
  • The district secured a reliable, feature-rich platform backed by a 7-year limited warranty.
  • IT administrators gained fleet-wide remote control using Manager Advanced, solving the management gaps they had with previous displays.
  • Classroom adoption jumped as teachers stopped using screens as basic projectors and started using the myViewBoard whiteboard and Google Drive lesson imports daily.

ViewSonic proved more reliable, affordable and feature-rich than the platform it replaced. The district plans to keep using year-end funds to finish outfitting roughly 850 classrooms as budget permits.
SOLUTION
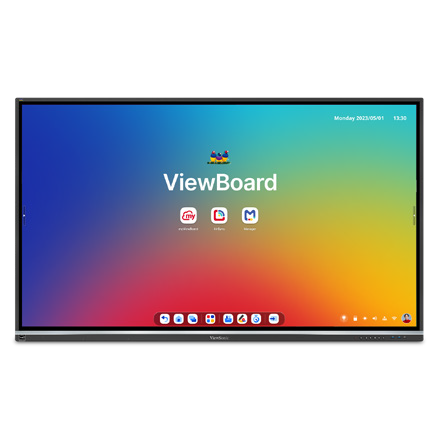
75” IFP7550 ViewBoard interactive displays
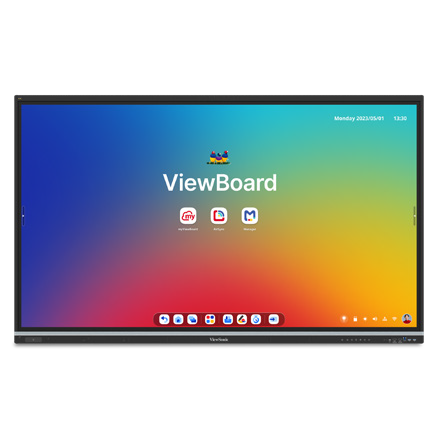
75” IFP7551 ViewBoard interactive displays (EDLA‑certified)

ViewSonic Manager advanced software

7-year ViewSonic extended warranty

Frequently Asked Questions


What Happens When an Interactive Display Vendor Discontinues Its Displays?

Districts can get stuck with failing hardware and no support path, which is exactly what happened here when the old fleet hit end-of-life early. Choosing a manufacturer committed to the interactive display market with long warranty terms protects your investment. This district made the switch with a full 7-year warranty.


What Software Comes with the IFP50 and IFP51 Series of ViewBoard Interactive Displays?

Both series include access to the myViewBoard ecosystem. This ecosystem includes myViewBoard whiteboard, ViewBoard Cast for wireless content sharing and single sign-on access to cloud storage like Google Drive and OneDrive. Teachers can import existing lesson plans directly, driving everyday classroom adoption.

The IFP51 series adds Android EDLA certification, giving IT teams verified access to the Google Play Store and a wider range of Google Mobile Servicescompatible apps.


How Do School Districts Manage a Large Fleet of Interactive Displays?

ViewSonic Manager Advanced provides a cloud console that lets IT teams check display health, push updates and manage apps across the district from one place. Licensing it one-to-one across all 445 screens closed a major management gap for this district.


How Long Is the Warranty on ViewSonic ViewBoard Interactive Displays?

The ViewBoard IFP50 and IFP51 series of interactive displays comes with an industry-leading 3-year standard on-site warranty covering parts, labor and backlight components. The district chose to extend coverage to 7 years on all 445 displays.


Ready to Replace an Aging or Discontinued IFP Fleet?

Talk to a ViewSonic representative or an authorized partner about a reliable, cost-effective ViewBoard refresh backed by long-term warranty protection and fleet management.
Training outcomes and participant experiences may vary depending on individual needs, district requirements, and implementation.

How a Large Texas District Started a Multi-Phase ViewBoard Interactive Display Rollout with Secure Sign-On

SOLUTION BRIEF

How a Large Texas District Started a Multi-Phase ViewBoard Interactive Display Rollout with Secure Sign-On

line drawing of a circular mazeline drawing of a circular maze
  • A large Texas district needed a secure, centrally managed display solution for its multi-classroom rollout.


“ViewSonic covered every requirement, and validating NFC authentication up front proved the solution met the district’s strict security standards.”


CHALLENGE

A large urban school district in Texas set out to modernize classroom technology across all its schools. The project started with 451 interactive displays in phase one, with plans to expand into thousands of additional classrooms later.

The district didn’t just need hardware. It required a complete solution that fit its Chrome and Google ecosystem, offered secure authentication for staff and students, provided mounting flexibility for different room layouts and enabled central fleet management.
Security was a top priority, especially around validating how badge authentication would work right at the display.

The timing for this project was also tight. Everything had to be sourced, shipped to multiple locations and delivered before a strict fiscal year-end deadline, requiring precise coordination with channel partners.

What ViewSonic Solution Did the District Deploy?

Working with CDW as its reseller partner, the district deployed a complete classroom technology package:

  • 451 ViewBoard® IFP8641 86” 4K Android EDLA interactive displays.
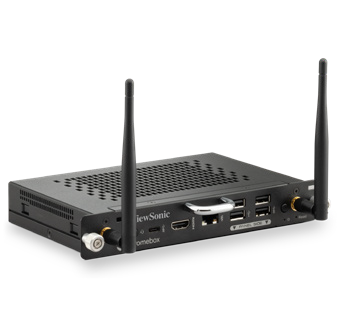
  • 451 VPC13-C33-G1 Chromebox OPS slot-in PCs built for Chrome OS and Google environments.
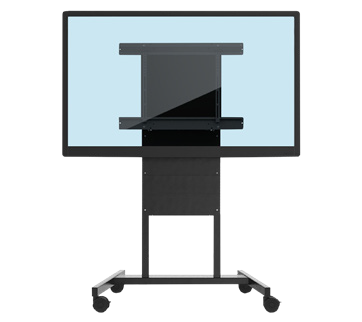
  • 481 VB-BLM-002 BalanceBox height-adjustable mounts, including extra units for existing displays.
  • 451 ViewSonic® Manager Advanced software 7-year licenses for central fleet management.

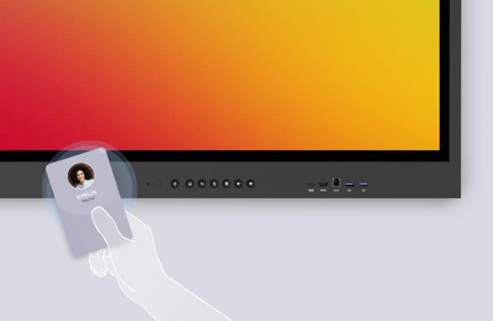
  • 451 NFC card readers for secure sign-on

The 86” ViewBoard IFP8641 anchored each room, VPC13-C33-G1 Chromebox OPS devices matched the district’s Google setup while NFC card readers gave teachers a fast, secure way to sign in at the display. VB-BLM-002 BalanceBox mounts allowed staff to set displays at the right height for every classroom.

The IFP8641 fit the district’s requirements on its own specs: an 86” 4K display with Android EDLA certification, built-in Google security, native access to Google and Microsoft ecosystems, EPEAT Silver and ENERGY STAR 8.0 ratings and a 3-year limited on-site warranty.

ViewSonic Manager Advanced software tied the whole setup together, giving IT central monitoring across every building. Before finalizing the deal, ViewSonic worked directly with the district to validate NFC functionality, resolving its primary security concern.

ViewSonic and its reseller partner coordinated a multi-location delivery plan to ensure all 451 displays and accessories arrived before the district’s fiscal yearend deadline.

Why Did the District Choose ViewSonic?

The district needed one manufacturer that could supply interactive displays, Chrome computing, secure authentication and central management as a complete package, delivered at scale on a tight deadline.

ViewSonic covered every requirement, and validating NFC authentication up front proved the solution met the district’s strict security standards.

ViewSonic’s reseller partner coordinated pricing, ordering and multi-location logistics, letting the district run a large, time-sensitive rollout through a single reseller relationship.

What Results Has the District Seen?

  • Deployed 451 interactive displays across the district on time to hit a strict fiscal year-end deadline.
  • Enabled secure sign-on at the display using NFC card readers, validated before purchase to meet security requirements.
  • Integrated Chrome OS computing into classrooms using Chromebox OPS devices.
  • Centralized fleet management through Manager Advanced software so IT supports every location from one platform.
  • Established a proven standard ready to expand across thousands of additional classrooms in future phases.

Phase one gave the district a secure, centrally managed display platform delivered on schedule. It also created a clear blueprint for the future: with the standard proven, the district and its partners can easily expand the same setup to thousands of other classrooms.

SOLUTION

86” IFP8641 ViewBoard interactive display

VPC13-C33-G1 Chromebox OPS slot-in PC

VB-BLM-002 BalanceBox mount

ViewSonic Manager Advanced software

ACR1552U-M1 NFC card reader

Frequently Asked Questions


How Does NFC Authentication Work on an Interactive Display?

NFC authentication lets users tap a card or badge on a reader at the display to sign in securely without typing passwords. This district added NFC card readers to its ViewBoard deployment so staff could sign on quickly and get started teaching faster.


Can Interactive Displays Run in a Chrome and Google Environment?

Yes. A Chromebox OPS device like the ViewSonic VPC13-C33-G1 turns a ViewBoard interactive display into a Chrome OS endpoint that fits into Google environments. This district paired all 451 IFP8641 displays with VPC13-C33-G1 devices so classrooms matched its existing setup.


How Does a District Manage Hundreds or Thousands of Interactive Displays?

Manager Advanced software is a cloud platform that lets IT teams check status, push updates and manage displays across every school from one dashboard. The district licensed Manager Advanced software for all 451 displays. This made the growing fleet easier to manage from one platform.


Can a District Roll Out Interactive Displays in Phases?

Yes. A phased rollout lets a district standardize on one platform, test it in real classrooms and expand with confidence. This district deployed 451 interactive displays in phase one and is ready to roll out the same setup across thousands of additional classrooms in upcoming phases.


Ready to Plan a District-Wide Display Rollout?

Talk to a ViewSonic representative or an authorized partner about standardizing interactive displays, Chrome computing, secure authentication and central management across your district.

Related Links

*The ACR1552U-M1 NFC card reader is third-party hardware (not a ViewSonic product), so it is named as deployed but not linked.

Performance, security, compliance, and sustainability outcomes may vary depending on system configuration, usage environment, and agency requirements. Training outcomes and participant experiences may vary depending on individual needs, district requirements, and implementation.

How Kentucky’s Largest College System Modernized Learning Spaces with ViewSonic

SOLUTION BRIEF

How a Pennsylvania School District Streamlined Campus Communications with ViewSonic

line drawing of a circular mazeline drawing of a circular maze
  • A 16-campus system needed a scalable display solution to replace decade-old classroom technology.


“By matching display technology to what each room actually needed, the integration partner and ViewSonic helped the school modernize its learning environments with a consistent, future-ready tech setup that balances performance, usability and overall value.”


CHALLENGE

Edtech funding is getting tighter, so higher education institutions have to carefully evaluate which solutions deliver the best value.

Across this 16-campus system serving 70,000+ students, many classrooms relied on technology that was over a decade old. Modernizing these spaces wasn’t optional if the institution wanted to support student recruitment, retention and engagement in a competitive landscape.

The institution needed a partner with a broad portfolio spanning interactive touch displays, commercial displays, Direct View LED video walls, monitors and projectors.

That way, it could match the right technology to each environment rather than force one solution everywhere.

As the system renovated and expanded its classrooms and event spaces, ViewSonic became a preferred partner for its reliable hardware and collaboration tools.

What ViewSonic Solution Did the Institution Deploy?

The institution’s integration partner worked with ViewSonic to build a standardized, scalable display strategy matched to each learning environment

  • 169 ViewBoard® interactive displays went into traditional instructional classrooms, giving faculty an intuitive platform for annotation, wireless content sharing and interactive lessons.
  • 6 ViewSonic® commercial displays were installed in lecture halls, auditoriums and assembly spaces to provide commercial-grade performance, integrate with third-party AV control platforms and run reliably in high-use environments.
  • 2 ViewSonic Direct View LED (dvLED) video walls were placed in spaces for maximum visual impact, delivering seamless, high-brightness images for large audiences.
  • 100 ViewSonic LCD monitors, 18 projectors and 5 ePoster displays were placed in across offices, labs, podiums and campus common spaces.
  • ViewSonic Manager Advanced software provided centralized, multi-campus device management.
By matching display technology to what each room actually needed, the integration partner and ViewSonic helped the school modernize its learning environments with a consistent, future-ready tech setup that balances performance, usability and overall value.

How Does the Institution Manage Displays Across 16 Campuses?

To get the most out of its investment, the institution uses ViewSonic Manager Advanced software to monitor and manage compatible devices across all campuses from one central dashboard. IT admins don’t have to travel to individual classrooms to deploy firmware updates, configure device settings, troubleshoot issues or schedule power on and off times.

Centralized management cuts operational costs, reduces classroom downtime and can extend device lifespan through proactive maintenance. This type of device management can also improve energy efficiency by making sure displays aren’t running when they’re not needed.

What Results Has the Institution Seen?

  • The institution replaced decade-old classroom tech with a standardized visual platform of 370 ViewSonic devices across 16 campuses, including 169 interactive displays, 76 commercial displays, 100 monitors, 18 projectors, 5 ePosters and 2 Direct View LED displays.
  • It lowered its total cost of ownership through centralized management, proactive maintenance and scheduled power controls.
  • IT staff can now support more classrooms across multiple campuses with fewer on-site resources.

SOLUTION

ViewSonic ViewBoard interactive displays

ViewSonic commercial displays

ViewSonic Direct View LED (dvLED) displays

ViewSonic LCD monitors

ViewSonic ePoster displays

ViewSonic Manager Advanced software

Frequently Asked Questions


How Should a University Match Display Types to Different Learning Spaces?

A proven approach uses interactive displays in instructional classrooms where faculty annotate and share content on the fly, commercial displays in lecture halls and auditoriums that need AV control integration, and Direct View LED video walls in large gathering spaces where brightness and scale matter most.

Kentucky’s largest public higher education system standardized on this strategy across 16 campuses with 370 devices, including 169 interactive displays, 76 commercial displays and 100 monitors.


How Do IT Teams Manage Displays Across a Multi-Campus Institution?

ViewSonic Manager Advanced lets IT admins remotely deploy firmware updates, configure settings, troubleshoot issues and schedule power on and off times from one console. That means fewer campus visits, less classroom downtime and displays that aren’t powered when they aren’t being used.


Do Interactive Displays Work for Career and Technical Programs, Not Just Lecture Classrooms?

Yes. This institution’s deployment spans nursing simulation labs, welding programs and traditional classrooms. Matching display types to each space’s function, rather than forcing a one-size-fits-all model, is what makes a multi-campus standard work.


How Do Display Choices Affect Total Cost of Ownership in Higher Education?

Total cost goes beyond the upfront price tag. Centralized management reduces on-site support trips, proactive maintenance extends device lifespan and scheduled power controls cut energy use.

This system paired standardized ViewSonic displays with Manager Advanced software to lower its total cost of ownership while supporting more classrooms with fewer resources.


Ready to Build a Campus-Wide Display Strategy?

Talk to a ViewSonic representative or an authorized partner about matching display technology to every learning space on your campus.


Drywall alone is not a structural mounting surface and must never be used as the sole means of support. Proper wall suitability, reinforcement, and the use of appropriate commercial-grade mounting hardware are the sole responsibility of the customer, installer, or system integrator. ViewSonic shall not be liable for any equipment damage, property damage, or personal injury, including death, caused as a result of incorrect installation, operation, human factors, or failure to comply with local codes. Training outcomes and participant experiences may vary depending on individual needs, district requirements, and implementation.

How to Choose Gaming Monitors for Schools

How to Choose
Gaming Monitors for Schools

Esports has become a real asset in K-12 and higher ed, helping students build college and career readiness, and the right monitor is where it all comes together. But the right gaming monitor for a middle school club looks a lot different from the one a college esports team needs. The good news is there’s a ViewSonic option for nearly every space, budget, and skill level.

This guide breaks down how to choose gaming monitors for schools based on the one thing that matters most: your scenario.

The short version: If you don’t have dedicated space, go portable. If you have a lab, choose by budget and competitive level. Entry-level competitive play starts at 180Hz, while dedicated esports programs benefit from 25-inch displays that reach 280Hz. Larger 27-inch screen sizes are great for more immersive gaming.

Start With Your Space, Not the Spec Sheet

It’s tempting to lead with refresh rates and screen sizes. But the smarter first question is simpler: where will these monitors live?

A program without a dedicated room has very different needs than one with a built-out lab. Once you know your space, the rest of the decision gets much easier. So let’s start there.

No Dedicated Space? You Have Options

Not every school has a room to spare for esports. The good news is you don’t need one to get started. There are two proven ways to build a program in shared or borrowed space.

Option 1: Go portable with a monitor cart.

The VX1654 (15.6 inches) and VX1754 (17.3 inches) are built to move. Both are Full HD IPS displays with a 144Hz refresh rate and AMD FreeSync, and both connect over a single USB-C cable that carries video, audio, and 60W of two-way power. At just 1.5 to 2 pounds and about as thin as a deck of cards, they slip right into a backpack or onto a cart. Pair a few with Nintendo Switch consoles and you’ve got a portable esports lab that rolls from room to room.

Portables are an underrated option in education. Many schools don’t think of them for gaming at all. But for programs without dedicated space, or with tight budgets, a portable setup is a creative and cost-effective way to launch esports without renovating a single room.

Option 2: Put the displays you already own to work.

If your classrooms have interactive flat panels, you may already have everything you need. That’s exactly how Fayette County Public Schools in Kentucky built the state’s first elementary esports program. Rather than buy new equipment, they leveraged their existing 75-inch ViewSonic ViewBoard displays, rolling cart-mounted panels into libraries and media centers to create pop-up esports lounges after school. Staff even packed “gamer backpacks” with everything students needed to connect, so a single plug turned any room into a ready-to-compete arena. The approach worked: the program grew from one pilot school to 41 schools in just two years, at no cost to participants.

The takeaway is simple. A big, vivid ViewBoard makes gameplay feel exciting on a screen the whole club can gather around, and it does double duty as an instruction tool by day and an esports arena after the bell.

Have a Dedicated Lab? Choose by Need

If you do have a dedicated space, the decision comes down to three things: your budget, the competitive level you’re aiming for, and how the lab will actually be used. Here are three tiers to consider.

Entry-Level Competitive: VX2418C and VX2428A

  • Refresh rate: 180Hz
  • Best for: schools that want solid gaming specs at a lower cost

Both 24-inch monitors hit a fast 180Hz refresh rate at a budget-friendly price. The VX2418C is a 1500R curved panel with a 1ms response time for an immersive feel, while the VX2428A uses a fast IPS panel with a 0.5ms response time and HDR10 support. Either one is a practical choice for labs that serve a wide range of students, from casual players to your competitive club.

Versatile Multi-Purpose: VX2730D-4K

  • Refresh rate: switchable between 144Hz at 4K and 288Hz at Full HD
  • Best for: labs that balance free play, classwork, video content, and competitive gaming

The VX2730D-4K is the chameleon of the lineup. Run it at 4K and 144Hz for immersive casual gaming, video, or general coursework. Then switch to Full HD at a blazing 288Hz when competitive play takes priority. It also has a 24.5-inch esports mode that shrinks the viewable area to the ideal competitive size, keeping the action in the player’s peripheral vision and reducing head movement. With AMD FreeSync Premium and NVIDIA G-Sync compatibility, it’s a true multi-purpose display that adapts to whatever the lab needs on any given day.

Ultra-Competitive: XG2536

  • Screen size: 25-inch display (24.5-inch viewable)
  • Refresh rate: 280Hz (overclocked)
  • Best for: dedicated esports programs focused on competitive play

When the goal is serious competition, the XG253 6 is built for it. The 24.5-inch viewable area sits at the ideal esports size, and the overclockable 280Hz refresh rate with a 0.5ms response time keeps fast action razor-smooth. It adds FreeSync Premium, G-Sync compatibility, RGB lighting, a narrow-footprint stand, and 65W USB-C charging, plus it connects to PCs and consoles alike, from PlayStation and Xbox to the Switch and Steam Deck.

From Amateur to Pro at a Glance

Not sure where to land? This simple framework is an easy starting point.

TIER

MODEL

WHAT YOU GET

BEST FOR

AMATEUR

VX2418C

24-inch, 1080p, 180Hz curved display at the best value

New clubs and casual play on a per-seat budget

COMPETITIVE

VX2728J-2K

27-inch, 1440p, 180Hz with advanced ergonomics

Growing programs that want sharper visuals and all-day comfort

PRO

XG2736-2K

27-inch, 1440p, 240Hz with USB-C and RGB

Established teams chasing every competitive edge


Each step up adds resolution, screen space, or speed, so match the tier to how seriously your program plays.

Compare ViewSonic Gaming Monitors for Education

Here’s the full lineup side by side.

MODEL

SIZE

WHAT YOU GET

MAX REFRESH RATE

BEST FOR

VX1654

15.6"

1080p

144Hz

Portable carts, no dedicated space

VX1754

17.3"

1080p

144Hz

A bigger screen for portable carts

VX2418C

24"

1080p (curved)

180Hz

Budget entry-level competitive

VX2428A

24"

 1080p

 180Hz

Budget entry-level competitive 

VX2728J-2K

27"

1440p 

 180Hz

Step-up sharpness and screen space

VX2730D-4K

27"

4K or 1080p 

 288Hz (at 1080p)

Multi-purpose: free play and competitive 

XG2536

25"

1080p 

 280Hz (OC)

Dedicated esports and pure speed

XG2736-2K

27"

 1440p

240Hz 

Top all-rounder: speed plus resolution

VX3218-PC-MHD

32"

 1080p

 180Hz

Large, immersive curved screen


How to Choose the Right Monitor Size

Screen size shapes the experience as much as refresh rate does. Here’s a quick guide to what works best where.

SIZE

BEST FOR

24 INCHES

The budget pick. Not perfect for any one thing, but a solid, affordable choice that still handles competitive play

25 INCHES

The competitive edge. The ideal esports size that keeps content in peripheral vision and minimizes head movement

27 INCHES

The versatile sweet spot. Not ideal for fast competitive genres like FPS and MOBA, but big enough for immersive RPGs and racing games

32 INCHES AND ABOVE

Built for immersion, plus fighting games where a bigger screen lets players gather around and play together


The VX2730D-4K deserves a special mention here. As a 27-inch monitor with a 24.5-inch esports mode, it bridges the gap between versatile sizing and competitive performance, which makes it a strong multi-purpose pick for labs that wear a lot of hats.

Common Questions About Gaming Monitors for Schools

What gaming monitor is best for a school with no dedicated space?

A portable monitor like the VX1654 or VX1754. Paired with a cart and consoles like the Nintendo Switch, it creates a mobile esports lab you can move between rooms.

What refresh rate do school esports programs need?

Entry-level competitive play works well at 180Hz. Dedicated esports teams benefit from higher rates, up to 280Hz on the XG2536, for the smoothest fast-paced gameplay.

What size monitor is best for esports?

About 25 inches is the sweet spot for competitive play. It keeps the action in the player’s peripheral vision and reduces head movement, which can make a real difference in fast games. We also offer a 27-inch model that features a 24.5-inch esports mode. This is a great dual-purpose option for computer labs.

Gaming Monitors Built With Education in Mind

ViewSonic designs gaming monitors with education in mind, balancing competitive performance, classroom versatility, and budget-conscious features across every product tier. Whether you’re rolling out a portable cart for a brand-new club or building a full esports arena, there’s a fit for your program.

Talk to a ViewSonic rep to find the right gaming monitors for your school.

Why Thunderbolt Monitors Future-Proof Your School

Why Thunderbolt Monitors
Future-Proof Your School

Every student and teacher on your campus has a device. But here’s the thing: those devices don’t all age at the same speed. Laptops take a beating and get replaced frequently. The monitor on the desk? It can easily outlast two or three rounds of laptops.

That gap is exactly why the display you buy today matters. A Thunderbolt monitor for schools is built to work with the laptops you have now and the ones you’ll buy later. Here’s why buying one now saves you money down the road.

The short version: Thunderbolt monitors are backward compatible with older Thunderbolt and USB-C devices and ready for new standards like USB4. So when you refresh your laptops, your monitors keep working. One display covers Mac labs, computer labs, and faculty desks alike.

Your Laptops and Monitors Don’t Age at the Same Rate

Most schools refresh student and teacher laptops frequently. There’s a good reason for that. Students aren’t gentle with their gear. Laptops get stuffed into backpacks, dropped in lockers, and opened and closed thousands of times. Hinges loosen, ports wear out, and screens crack.

It’s not just wear and tear, either. Plenty of students bring their own laptops, and no two are quite the same. You’ve got a wide range of brands, ages, and preferences plugging in across campus, so the monitors on your desks have to work with all of them, not just the machines you bought.

Monitors live an easier life. They sit on a desk. They don’t have hinges to break or get tossed around campus, so a quality monitor can keep going for years longer than the laptop in front of it.

That means it is a smart move to invest in a Thunderbolt monitor that can easily outlast the lifecycle of regular laptops or MacBooks. The smart move is to buy a monitor that won’t care which laptop you plug into it, this year or a few years from now.

What Makes a Thunderbolt Monitor Future-Proof?

A future-proof display has to do one job really well: connect to whatever device comes next. ViewSonic® Thunderbolt monitors are designed for exactly that.

Here’s what keeps them ready for the long haul:

  • Backward compatible. They work with Thunderbolt 3 and Thunderbolt 2 devices, so older MacBooks or laptops in your fleet aren’t left behind.
  • Universal connection. Any laptop with a video-capable Thunderbolt or USB-C port connects and works, Mac or Windows.
  • USB4 ready. They support USB4 protocols, so you’re prepared for the next wave of laptops and tablets.

Thunderbolt is an Intel-developed standard, which is part of why it plays so well across brands and generations. Whether your next purchase is a MacBook, a Windows laptop, or something that hasn’t launched yet, the monitor on the desk stays useful.

Better Specs That Keep Up with Demanding Work

Future-proofing isn’t only about ports. It’s also about performance that won’t feel dated in a year.

ViewSonic Thunderbolt monitors deliver higher specs and better resolution, with crisp 4K and 5K options for design, photo, and video work. They also support daisy chaining, so you can run dual 4K or 5K displays from a single connection. That’s a clean, cable-light setup for labs and studios, and it scales as your program grows.

One Monitor for Mac Labs and Computer Labs

A lot of campuses run mixed environments. The design department is on Macs. The library and general labs are on Windows. Buying different monitors for each is a headache and a budget drain.

Thunderbolt monitors work great in a Mac lab or a regular computer lab. The same display can sit in a creative arts studio and a general-purpose lab. That’s one product line, one thing to standardize on.

Meet the ViewSonic Thunderbolt Monitor Lineup

Four models in the ViewSonic ColorPro® VP series check every box for a future-proof campus. All of them connect to Mac and Windows devices over Thunderbolt and USB-C, and they share the same baseline features:

  • Thunderbolt 4 with 100W charging
  • Tested EDID for reliable plug-and-play recognition
  • Full DDC/CI support for ColorPro Display Manager
  • Pantone Validated color accuracy
  • 98% to 99% DCI-P3 coverage
  • Full ergonomic adjustments: height, tilt, swivel, and pivot
  • Built-in USB hub
  • Three-year limited warranty

The difference comes down to size, resolution, and docking features. Here’s how to pick the right one.

VP2788-5K: 27” 5K ColorPro Monitor

The VP2788-5K is the lineup’s sharpest display. At 218 PPI, its 5K panel matches the quality of a MacBook Pro screen, so everything stays consistent when students and faculty look between the two. It’s a natural fit for design and media labs, and dual 5K daisy chaining lets you run two of them from a single Thunderbolt cable.

  • Panel: 27-inch IPS, 5K (5120×2880), 218 PPI, 60Hz, and HDR400
  • Color: 99% DCI-P3, 100% sRGB, and Pantone Validated
  • Connectivity: Thunderbolt 4 with 100W power delivery, dual 5K daisy chain, HDMI, DisplayPort, and a USB hub

See the VP2788-5K


VP2488-4K: 24” 4K ColorPro Monitor

The VP2488-4K delivers strong pixel density without taking over the desk. At 24 inches and 184 PPI, it gives you sharp text and clean HiDPI scaling in a compact footprint. That makes it a great choice for libraries, shared workstations, and faculty offices. It supports dual 4K daisy chaining too, so you can wire two together from a single port.

  • Panel: 24-inch IPS, 4K (3840×2160), 184 PPI, and 60Hz
  • Color: 98% DCI-P3, 100% sRGB, and Pantone Validated
  • Connectivity: Thunderbolt 4 with 100W power delivery, dual 4K daisy chain, HDMI, DisplayPort, and a USB hub

See the VP2488-4K


VP2776T-4K: 27” 4K ColorPro Docking Monitor

The VP2776T-4K turns the monitor into a full single-cable docking station. Its built-in RJ45 Ethernet port routes a wired network connection straight through the Thunderbolt cable to the laptop, Mac or Windows. That means fewer adapters at every desk and no spotty Wi-Fi during video calls or large file uploads, which is ideal for busy labs and front-desk workstations.

  • Panel: 27-inch IPS, 4K (3840×2160), 60Hz, and HDR400
  • Color: 98% DCI-P3, 100% sRGB, and Pantone Validated
  • Connectivity: Thunderbolt 4 with 100W power delivery, RJ45 Ethernet, dual 4K daisy chain, HDMI 2.1, DisplayPort, USB hub, and dual speakers

See the VP2776T-4K


VP3276T-4K: 32” 4K ColorPro Docking Monitor

The VP3276T-4K gives editors, engineers, and designers serious screen real estate without adding to the cable clutter. The 32-inch 4K screen leaves plenty of room for long video timelines, layer panels, and side-by-side apps. Like the 27-inch docking model, it features RJ45 Ethernet and a full USB hub, so the whole desk connects through one cable.

  • Panel: 32-inch IPS, 4K (3840×2160), 60Hz, and HDR400
  • Color: 98% DCI-P3 and Pantone Validated
  • Connectivity: Thunderbolt 4 with 100W power delivery, RJ45 Ethernet, dual 4K daisy chain, HDMI, DisplayPort, USB hub, and VESA mounting See the VP3276T-4K

See the VP3276T-4K

Common Questions About Thunderbolt Monitors for Schools

Are Thunderbolt monitors backward compatible?

Yes. ViewSonic Thunderbolt monitors work with Thunderbolt 3 and Thunderbolt 2 devices, plus standard USB-C laptops. Older devices in your fleet will still connect.

Will a Thunderbolt monitor work with future laptops?

It should. These monitors support USB4 protocols, the foundation for upcoming Thunderbolt and USB-C devices, so they’re built to keep pace with new hardware.

Do they work with both Mac and Windows?

Yes. Thunderbolt is cross-platform, so one monitor serves Mac labs, Windows labs, and faculty offices equally well.

Future-Proof Your School With ViewSonic

Buying a Thunderbolt monitor now lets you spend once and stay ready for device refreshes. You get a display that works with today’s laptops, tomorrow’s laptops, and both Mac and Windows along the way.

Working with a tighter budget? We have other great monitors that can fit your needs too.

Talk to a ViewSonic rep to find the right displays for your campus.

Stop Tab-Switching: How Daisy Chaining Monitors Boosts School Productivity

BUYER'S GUIDE

Stop Tab-Switching:
How Daisy Chaining Monitors Boosts School Productivity

You know the feeling. You’re working on something important and you’ve got five tabs open, two windows overlapping and a document buried somewhere underneath it all. Every time you switch between them you lose your place, your focus and a little bit of your patience.

For teachers, staff and students, that’s not just an annoyance. It’s a productivity killer. And there’s a simple fix.

What Is Daisy Chaining?

Daisy chaining is a way of connecting multiple monitors in a sequence, where each display links to the next rather than running separate cables back to your laptop or docking station. Think of it like holiday lights. You plug the first strand into the wall, then connect each additional strand to the one before it. One source. Multiple displays. Clean and simple.

In a school setting, daisy chaining means you can set up a dual-monitor workstation with fewer cables, less clutter and a much cleaner desk.

Who Benefits from Daisy Chaining in Schools?

Across a school or university campus, daisy chaining multi-screen setup adds real value for just about everyone.

Students in Computer Labs

Students writing papers or working on research projects often need to reference multiple sources at once. Articles, PDFs, datasets and their own document all need to be visible at the same time. A dual-monitor setup lets them keep everything in view instead of constantly switching windows. That’s especially valuable during high-stakes work like dissertations or thesis projects. 

Faculty

Instructors work across a lot of tools simultaneously. LMS platforms, lecture slides, grading systems and student submissions all need attention at once. With two screens, a faculty member can build a lesson on one display while referencing content on the other, or review student work while entering grades in real time. No more toggling. No more losing your place.

Administrative Staff

Admin teams juggle calendars, spreadsheets, budgets and communications all day long. A multi-display setup lets them see a full week’s schedule on one screen and a budget spreadsheet on the other. It’s a simple change that improves accuracy and cuts down on the back-and-forth that slows planning down.

IT Teams

IT departments need visibility across multiple systems at once. Device dashboards, remote desktops, network tools and support tickets all compete for screen space. Daisy chaining supports a control room-style setup where system health, alerts and active sessions are all visible simultaneously. Less toggling means faster troubleshooting and fewer things slipping through the cracks.

Good, Better, Best: ViewSonic Daisy Chain Options

Not all daisy chain setups work the same way. ViewSonic offers options at every budget and performance level so schools can find the right fit.

Good: DisplayPort Daisy Chaining

For schools looking to maximize value, select ViewSonic monitors support daisy chaining via DisplayPort. Connect your laptop to the first monitor via USB-C and link the second monitor with a DisplayPort cable. It’s a cost-effective way to get a dual-screen setup without a major hardware investment. Keep in mind that USB ports on the second monitor won’t be active in this configuration unless you also utilize a USB A/B cable between the two monitors.

Better: USB-C Daisy Chaining

Our USB-C docking monitors take it a step further. Using USB-C port, you can connect your laptop with a single USB-C cable and daisy chain a second monitor also through a USB-C cable. No additional cable is needed to connect the USB ports on the second monitor. USB-C daisy chains also support up to 100W power delivery, so your laptop or student chromebooks charge at the same time.

Best: Thunderbolt Daisy Chaining

For schools running Macs or laptops with USB-C or Thunderbolt connectors, ViewSonic Thunderbolt monitors offer the highest level of performance and compatibility. Thunderbolt supports USB-C protocols, so they work with a wide range of Thunderbolt or USB-C devices. They deliver blazing-fast data transfer and powerful charging, and they’re built to stay relevant no matter what devices your school purchases down the road. They can also save your school money compared to premium alternatives like the Mac Studio setup.

More Visibility. Less Friction. Better Results.

The core value of a multi-display setup is simple. When users can see more at once, they switch less, focus more and get more done. Whether it’s a student finishing a thesis, a teacher building a lesson plan or an IT admin monitoring a network, two screens make the work easier.

ViewSonic makes it simple to get there, with flexible daisy chain options at every budget, clean single-cable setups and a full lineup of education monitors built for school environments.

Ready to find the right setup for your school?
Explore ViewSonic Education Monitors 

Sustainable Monitor Packaging: The Eco-Friendly Choice for Schools

BUYER'S GUIDE

Sustainable Monitor Packaging:
The Eco-Friendly Choice for Schools

Schools are under pressure to do more with less. Budgets are tight. Sustainability goals are inspiring. ViewSonic offers budget-friendly and eco-friendly solutions through the packaging materials we use for our business monitors.

Why Eco-Friendly Packaging Matters for Schools

Whether your district is working toward a green school certification, and/or reducing waste in your facilities, sustainable packaging is a meaningful place to start. It’s not just about the environment. Eco-friendly packaging means less material to dispose of, less strain on your custodial staff and fewer costs associated with waste removal. It’s a small change that adds up fast across a large deployment.

What ViewSonic Is Doing Differently

We’ve made a series of concrete changes to how we package our monitors. ViewSonic business monitor packaging is designed to reduce waste without compromising protection.

No More Styrofoam

We’ve eliminated styrofoam from our business monitor packaging entirely. In its place, we use paper pulp inserts that hold monitors securely and break down far more responsibly after disposal.

Plastic-Free Cable Packaging

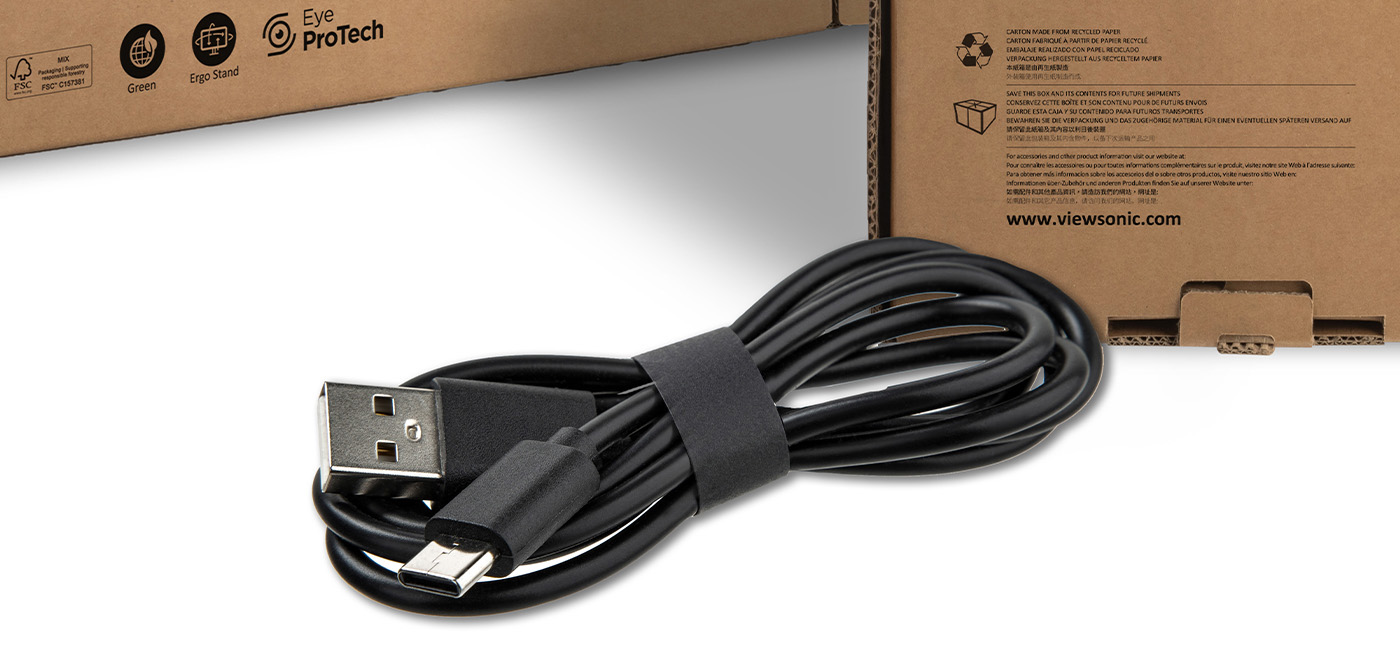
Plastic cable bags are gone too. Select models now have cables that come packaged directly in the box without the extra plastic wrapping. Less waste per order, every time.

FSC-Certified Materials

Select ViewSonic monitors carry FSC certification, which means the materials used in our packaging come from responsibly managed forests. It’s a standard your school can be proud of when reporting on sustainability initiatives.

Water-Based Ink Printing

With the FSC certification, the printing on select packaging uses water-based inks. This is an eco-conscious choice that reduces environmental impact without sacrificing durability or design quality.

Dual-Head Packs

For select monitors, ViewSonic offers dual-head packs that remove the stand from the packaging entirely. Shipping two monitor heads in one box also means fewer cartons to recycle. All dual-head packs ship in eco-friendly packaging, so schools can cut waste without cutting corners.

Energy Efficiency That Goes Beyond the Box

Sustainable packaging is just one part of the picture. ViewSonic monitors are also designed to reduce energy consumption over their lifetime.

Several monitors carry EPEAT certifications at the Bronze, Silver or Gold level, along with ENERGY STAR® certification. EPEAT recognizes products that meet strict environmental performance standards across their full lifecycle, from materials to end-of-life disposal, with Gold representing the highest tier. ENERGY STAR certification means the monitor meets EPA guidelines for energy efficiency, helping schools reduce electricity costs and lower greenhouse gas emissions over time.

Together, these certifications make ViewSonic monitors a strong choice for schools pursuing green purchasing programs or working toward sustainability benchmarks set by their district or state. 

The Bottom Line for Schools

Sustainable purchasing doesn’t have to mean spending more. ViewSonic’s eco-friendly packaging choices are built into our standard products, not sold as a premium add-on. When you order ViewSonic monitors for your school, you’re getting displays designed with the environment in mind from the box they come in to the energy they consume every day.

Less waste. Lower costs. A better investment for your school and the planet.

Ready to explore ViewSonic’s full lineup of education monitors?

Explore ViewSonic Education Monitors 

dvLED Install Gotcha #4: Do You Actually Have the Right Tools?

BUYER'S GUIDE

dvLED Install Gotcha #4: Do You Actually Have the Right Tools?

You can’t improvise your way through a Direct View LED (dvLED) installation.

Missing the right tool on the day doesn’t mean a quick run to the hardware store. It means a stalled install, a frustrated client and a job that costs more than it should have.

Here’s the fix. It all happens before you show up, not on install day.

What tools does a dvLED install actually require?

The equipment list goes beyond what most general AV installs demand. A few items are non-negotiable.

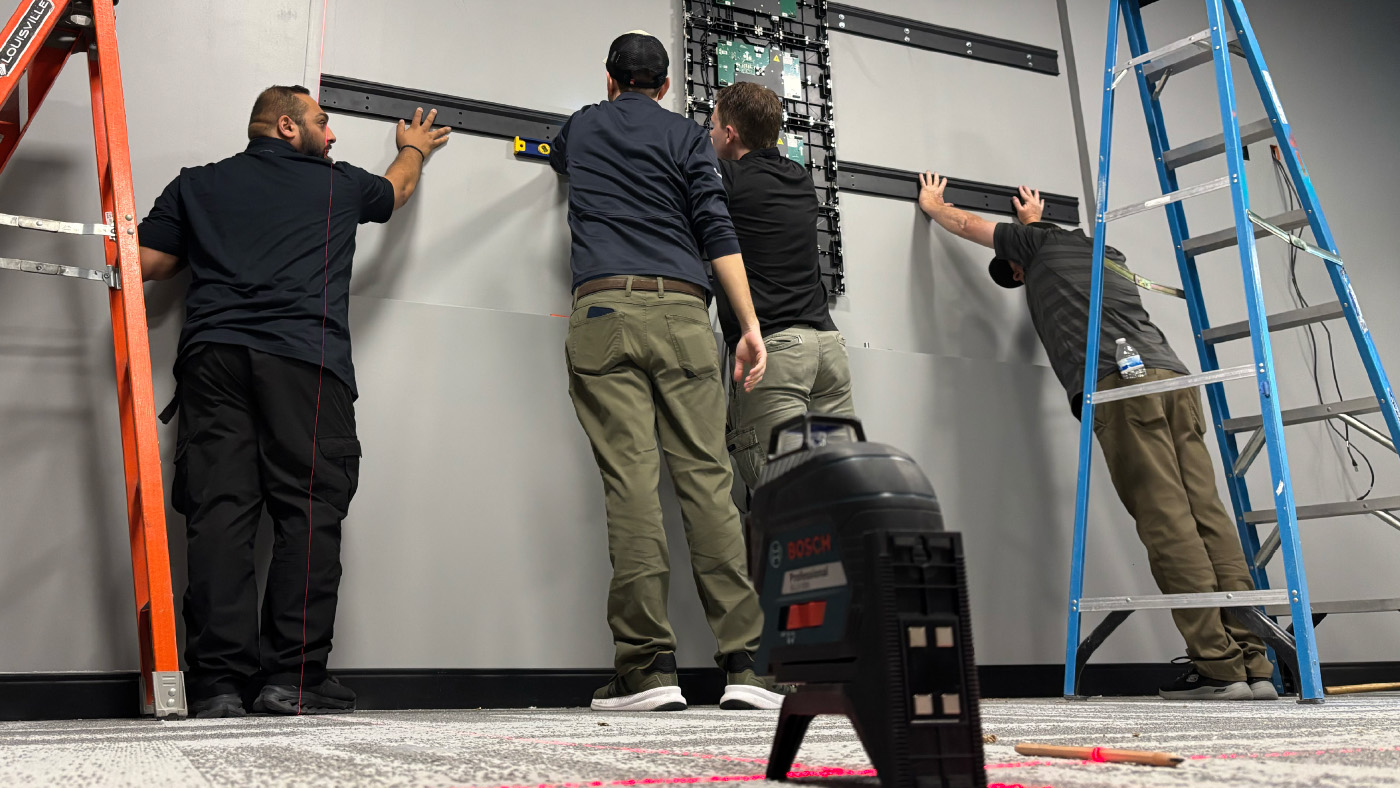
A panel lift or scissor lift is often needed when a ladder is not safe due to the height. Trying to install with just a ladder when it is too high can lead to lost time and risks damage.

Manufacturer-specific tools matter more than people expect. Many systems have unique mounting and alignment requirements, and generic substitutes often don’t fit or don’t work.

A laser level is essential, but there’s a difference between owning one and using it correctly. Make sure the right person is running it, and match the tool to the job. A small beam meant for a 6-inch level isn’t the right choice for a large-format wall.

What’s the one tool most crews forget?

The ones you can’t grab at a hardware store on the way to the job. That’s the pattern behind almost every tool-related delay.

Some gear has to be rented and reserved ahead of time. A panel lift or scissor lift is the obvious one. Show up without it and there’s no quick fix, and a rental you forgot to book is a day you don’t get back.

Then there are the manufacturer-specific tools that ship with the system itself. Spare tiles, tile removal tools and other items packed in the box are easy to leave behind. Check the packaging before you leave and bring what came with the display.

Finally, use ESD protection on every job. Static damage to LED modules is invisible at install time and shows up later as dead pixels or early failures. Pack spare ESD gloves too, in case a set isn’t included.

This is one place an all-in-one system quietly helps. Every ViewSonic All-in-One dvLED ships with calibrated spare tiles, ESD glove protection and suction tools included, so the gear you’re most likely to forget is already in the box.

How do you build a standard dvLED install kit?

Plenty of installation teams try to run off memory alone. Professionals run from a documented, standardized install kit checklist that assigns responsibility for each item before every job.

That checklist should be a non-negotiable part of your pre-install process, reviewed and signed off by the project lead before anyone leaves for the site. Fewer surprises on-site means fewer delays, and delays are what eat your margin.

Preparation is what makes an install fast. Not rushing.

Frequently Asked Questions

What tools do you need to install a dvLED wall?

At minimum, a panel or scissor lift for anything above eye level, the manufacturer’s specific mounting tools, a properly sized laser level, ESD protection and spare modules on-site. Build these into a documented kit checklist for every job.

Why is ESD protection important for dvLED?

Static discharge can damage LED modules in ways you can’t see at install time. The damage surfaces later as dead pixels or early failures. ESD protection is inexpensive to use and prevents costly callbacks, which is why it should never be skipped.

Do you need spare dvLED tiles on-site?

Yes. Construction environments are tough on hardware, and a dropped tile can crack or damage a module that needs to be swapped on the spot. Without spares on hand, that one damaged tile can stall the whole install while you wait on a replacement to ship. ViewSonic dvLED includes 5% calibrated spare tiles with every unit, so a color-matched replacement is ready and the project stays on schedule.

Show up to every install prepared

Want the complete framework for dvLED installation readiness?

The ViewSonic® dvLED Certification Program is a hands-on, two-day course led by ViewSonic Solutions engineers. Graduates earn CTS and CTS-I renewal units. It covers pre-install checklists, structural planning and real-world field techniques. Reserve your spot today.

Direct View LED (dvLED) Installation Disclaimer: This installation gotcha blog series is provided for informational and convenience purposes only and should not be treated as a comprehensive architectural or engineering blueprint. Actual installation performance, structural suitability, and product outcomes may vary depending on system configuration, network conditions, usage environment, wall construction, agency or local code requirements and other factors. Drywall alone is not a structural mounting surface and must never be used as the sole means of support for a dvLED system. Proper wall flatness verification, load-bearing reinforcement, dedicated circuit power routing, and the use of commercial-grade hardware are the sole responsibility of the customer, installer, or system integrator. ViewSonic does not design, inspect, or certify wall structures or independent installation methods. Installers must consult a licensed contractor, structural engineer, or qualified AV professional prior to execution. ViewSonic assumes no liability for any errors, equipment damage, property damage, or personal injury, including death, caused as a result of incorrect field installation, human factors, or failure to comply with local codes and safety instructions. [26DIG-ENT1494e4]

dvLED Install Gotcha #3: “I Have an Outlet, I’m Good, Right?”

BUYER'S GUIDE

dvLED Install Gotcha #3: “I Have an Outlet, I’m Good, Right?”

You have power. You have an outlet on the wall. But that’s just half the story.

Power is the most underestimated part of a Direct View LED (dvLED) installation. Get it wrong and you might not see the problem on install day at all. Your client sees it later, as system instability, early component failures and service calls that never should have happened.

Why isn’t a standard outlet enough for a dvLED wall?

A typical wall outlet wasn’t designed for the demands of a large dvLED install, and the issues stack up fast.

Shared circuits cause voltage drops when other devices pull power on the same line. Flush-mounted outlets tucked behind panels leave no clearance for connectors, which makes the system almost impossible to service without pulling tiles. Cables routed without attention to bend radius cause alignment issues from day one. And power components crammed into tight spaces with no airflow run hot, and hot components fail early.

Here’s the pattern. Some of these problems show up on install day. Others don’t show up for months.

What does proper dvLED power planning look like?

Start with dedicated circuits. This keeps one fault from taking down the whole display. Larger walls often need more than one circuit to cover the full load.

Plan for service access. Recessed electrical boxes create the clearance connectors need, and 90-degree connectors manage cable bend radius without routing cables in ways that damage them over time. If a technician can’t reach the power without pulling the wall apart, the plan isn’t finished.

Design for heat. Airflow and thermal management belong in the conversation before installation begins, not as an afterthought once equipment is already in the wall.

What’s the simple test for a good power plan?

Ask one question before every install. Is there sufficient power for maximum load that is accessible without interference? If the answer is no, the power plan needs another pass.

Power is never an afterthought on a professional installation. It’s infrastructure. Plan it like infrastructure, or plan on callbacks.

Frequently Asked Questions

Can you plug a dvLED wall into a standard outlet on a shared circuit?

Not safely for a large install. A standard outlet and shared circuit can cause amperage overloads and trip the circuit breaker, leading to lost power and unnecessary downtime. Most dvLED walls need dedicated circuits per section, planned service access and proper heat management designed in before installation.

Why do some dvLED power problems show up right away and others months later?

Some problems show up on day one. If a cable bend radius is too tight, you will see alignment issues the moment the wall goes up. Others take longer. Shared circuits can trip later when other equipment is added, and trapped heat wears components down gradually. So the install looks fine on day one, then instability and early failures appear months later as service calls.

Build power systems that actually last

Ready to take the guesswork out of your dvLED power design?

The ViewSonic® dvLED Certification Program is a hands-on, two-day course led by ViewSonic Solutions engineers. Graduates earn CTS and CTS-I renewal units. It covers pre-install checklists, structural planning and real-world field techniques. Reserve your spot today.

Direct View LED (dvLED) Installation Disclaimer: This installation gotcha blog series is provided for informational and convenience purposes only and should not be treated as a comprehensive architectural or engineering blueprint. Actual installation performance, structural suitability, and product outcomes may vary depending on system configuration, network conditions, usage environment, wall construction, agency or local code requirements and other factors. Drywall alone is not a structural mounting surface and must never be used as the sole means of support for a dvLED system. Proper wall flatness verification, load-bearing reinforcement, dedicated circuit power routing, and the use of commercial-grade hardware are the sole responsibility of the customer, installer, or system integrator. ViewSonic does not design, inspect, or certify wall structures or independent installation methods. Installers must consult a licensed contractor, structural engineer, or qualified AV professional prior to execution. ViewSonic assumes no liability for any errors, equipment damage, property damage, or personal injury, including death, caused as a result of incorrect field installation, human factors, or failure to comply with local codes and safety instructions. [26DIG-ENT1494e3]

dvLED Install Gotcha #2: Can Your Wall Actually Support the Weight?

BUYER'S GUIDE

dvLED Install Gotcha #2: Can Your Wall Actually Support the Weight?

A Direct View LED (dvLED) display isn’t just a screen. It’s a system.

Panels, mounting structure, cabling and power components all go on your wall, and all of it adds up.

The question isn’t whether your wall can hold the display during the install. It’s whether it’s built to carry the full load, day after day, for years. This is the gotcha that doesn’t just slow an install down. It stops it completely.

What does a dvLED system actually weigh?

That depends on the size and configuration, but the weight adds up faster than most people expect. A large Direct View LED wall, once you count panels, mounting structure and cabling, can reach several hundred pounds spread across the surface. Standard drywall anchored into wood studs was never rated for that kind of distributed load, especially with years of vibration and thermal cycling working against it.

Before anything goes up, confirm four things: the total system weight (panels plus mounting plus cabling), the stud spacing, the mounting surface type and whether structural backing is required to carry the load safely.

What do you do when the wall isn’t ready?

For most commercial installs, the answer is adding structural backing before the mount goes up. Common solutions include Unistrut channel systems, steel stud framing and plywood backing across the mounting area. The right choice depends on the wall construction, the total load and the mounting system you’re using.

For larger or custom walls, bring in a structural engineer early. A quick review at the planning stage costs far less than finding a load problem mid-install, or worse, after the display is already live and a client is watching.

What’s the one rule that prevents most structural problems?

Add a structural verification step to every pre-install checklist. Confirm the mounting surface. Confirm the load rating. Get written sign-off before your crew arrives. If a structural review is needed, schedule it weeks out, not as a last-minute check the morning of.

The fastest way to slow an install to a stop is to find a structural problem on day one. The fix is almost always cheaper and faster when you catch it on paper.

Frequently Asked Questions

How much does a dvLED video wall weigh?

It varies by size and configuration, but a large dvLED wall including panels, mounting and cabling can reach several hundred pounds distributed across the surface. Always confirm the total system weight before choosing a mounting method or approving the wall.

Can you mount a dvLED wall on drywall?

You can, but only if the drywall surface is flat within tolerance and the structure behind it can carry the load. Install on the studs behind the drywall and use plywood backing if you need a continuous mounting surface. Many walls need shims or a substructure to hit the flatness spec. Always verify with a laser level before install day.

When should you involve a structural engineer?

Bring in a structural engineer early for large or custom dvLED walls, or any time the load or wall construction is uncertain. A short planning-stage review costs far less than discovering a load problem during or after installation.

Build structural planning into every job

Ready to streamline your site prep and deliver seamless installations from day one?

The ViewSonic® dvLED Certification Program is a hands-on, two-day course led by ViewSonic Solutions engineers. Graduates earn CTS and CTS-I renewal units. It covers pre-install checklists, structural planning and real-world field techniques. Reserve your spot today.

Direct View LED (dvLED) Installation Disclaimer: This installation gotcha blog series is provided for informational and convenience purposes only and should not be treated as a comprehensive architectural or engineering blueprint. Actual installation performance, structural suitability, and product outcomes may vary depending on system configuration, network conditions, usage environment, wall construction, agency or local code requirements and other factors. Drywall alone is not a structural mounting surface and must never be used as the sole means of support for a dvLED system. Proper wall flatness verification, load-bearing reinforcement, dedicated circuit power routing, and the use of commercial-grade hardware are the sole responsibility of the customer, installer, or system integrator. ViewSonic does not design, inspect, or certify wall structures or independent installation methods. Installers must consult a licensed contractor, structural engineer, or qualified AV professional prior to execution. ViewSonic assumes no liability for any errors, equipment damage, property damage, or personal injury, including death, caused as a result of incorrect field installation, human factors, or failure to comply with local codes and safety instructions. [26DIG-ENT1494e2]

dvLED Install Gotcha #1: What Happens When Your Wall Isn’t Flat?

BUYER'S GUIDE

dvLED Install Gotcha #1: What Happens When Your Wall Isn’t Flat?

Most Direct View LED (dvLED) installs don’t fail because of the technology. They fail because of the wall behind it.

Wall flatness is the first thing a dvLED install team should verify, and it’s the last thing many crews actually check before they show up on-site. Get it wrong and a one-day install turns into a two- or three-day rework job. The panels are fine. The wall was never ready.

This is the first in our series on the five most common dvLED install gotchas, and it’s the one that catches even experienced teams off guard.

What’s the acceptable flatness tolerance for a dvLED wall?

For a clean dvLED install, the mounting surface needs to be flat to a tight tolerance across the whole wall. A common target is around 5mm over the full surface. Go beyond that and you start to see the problems that make a wall look cheap: visible seams between modules, uneven pixel alignment and brightness that shifts from tile to tile.

Here’s the hard part. Walls that look perfectly flat to the naked eye fail this spec all the time.

Why does wall flatness catch installers off guard?

The problem isn’t that walls are obviously crooked. It’s that small imperfections add up. A slight bow in drywall, framing that isn’t consistent behind the surface, a little waviness in plaster or concrete. On a 4-foot section, nobody notices. Across a 20-foot display wall, those small deviations stack into a seam you can see from across the room./span>

There’s a money side to this too. Every client asks the same question before an install: how long will this take? If you quoted a flat wall and you find a bowed one on day one, your timeline and your margin both take the hit.

Discovering the problem on install day leaves you two options. Shim every mount point by hand, or build a substructure from scratch. Neither is fast. Neither is cheap. And both can delay installation by days.

How do you prevent flatness problems before install day?

Measure the wall before install day, not the morning of. Run a laser level across the full surface, document every deviation and pick your correction strategy in advance. When you plan the fix ahead of time, it’s a task. When you find it live, it’s a crisis. If you cannot measure beforehand, assume the wall isn’t flat and start planning accordingly.

Set the standard with your client up front. Put the flatness requirement in writing, get structural sign-off and build correction time into the project plan instead of hoping your contingency budget covers it.

What belongs on your pre-install flatness checklist?

Keep it simple and do it every time.

First, confirm the wall type and construction. Then laser-level the full surface and log any uneven spots. Compare those numbers against your flatness specs. You should choose your correction method, like shims or a substructure, well before install day.

Don’t forget to get written structural sign-off from the client.

If you can’t check the wall ahead of time, assume it isn’t flat. Prepping early keeps you from facing costly delays on install day.

Frequently Asked Questions

What flatness tolerance does a dvLED wall need?

Most dvLED installs target a flat mounting surface within 5mm across the full wall. Beyond that, you risk visible seams, uneven tile alignment that can’t be fixed once the panels are mounted.

Can you install dvLED on drywall?

You can, but only if the drywall surface is flat within tolerance and the structure behind it can carry the load. Install on the studs behind the drywall and use plywood backing if you need a continuous mounting surface. Many walls need shims or a substructure to hit the flatness spec. Always verify with a laser level before install day.

Get certified before your next install

Want to build the habits that separate fast, profitable installs from expensive rework calls?

The ViewSonic® dvLED Certification Program is a hands-on, two-day course led by ViewSonic Solutions engineers. Graduates earn CTS and CTS-I renewal units. It covers pre-install checklists, structural planning and real-world field techniques. Reserve your spot today.

Direct View LED (dvLED) Installation Disclaimer: This installation gotcha blog series is provided for informational and convenience purposes only and should not be treated as a comprehensive architectural or engineering blueprint. Actual installation performance, structural suitability, and product outcomes may vary depending on system configuration, network conditions, usage environment, wall construction, agency or local code requirements and other factors. Drywall alone is not a structural mounting surface and must never be used as the sole means of support for a dvLED system. Proper wall flatness verification, load-bearing reinforcement, dedicated circuit power routing, and the use of commercial-grade hardware are the sole responsibility of the customer, installer, or system integrator. ViewSonic does not design, inspect, or certify wall structures or independent installation methods. Installers must consult a licensed contractor, structural engineer, or qualified AV professional prior to execution. ViewSonic assumes no liability for any errors, equipment damage, property damage, or personal injury, including death, caused as a result of incorrect field installation, human factors, or failure to comply with local codes and safety instructions. [26DIG-ENT1494e1]

From Passive to Participatory: Transforming Classrooms with ViewBoard Interactivity

From Passive to Participatory: Transforming Classrooms with ViewBoard Interactivity

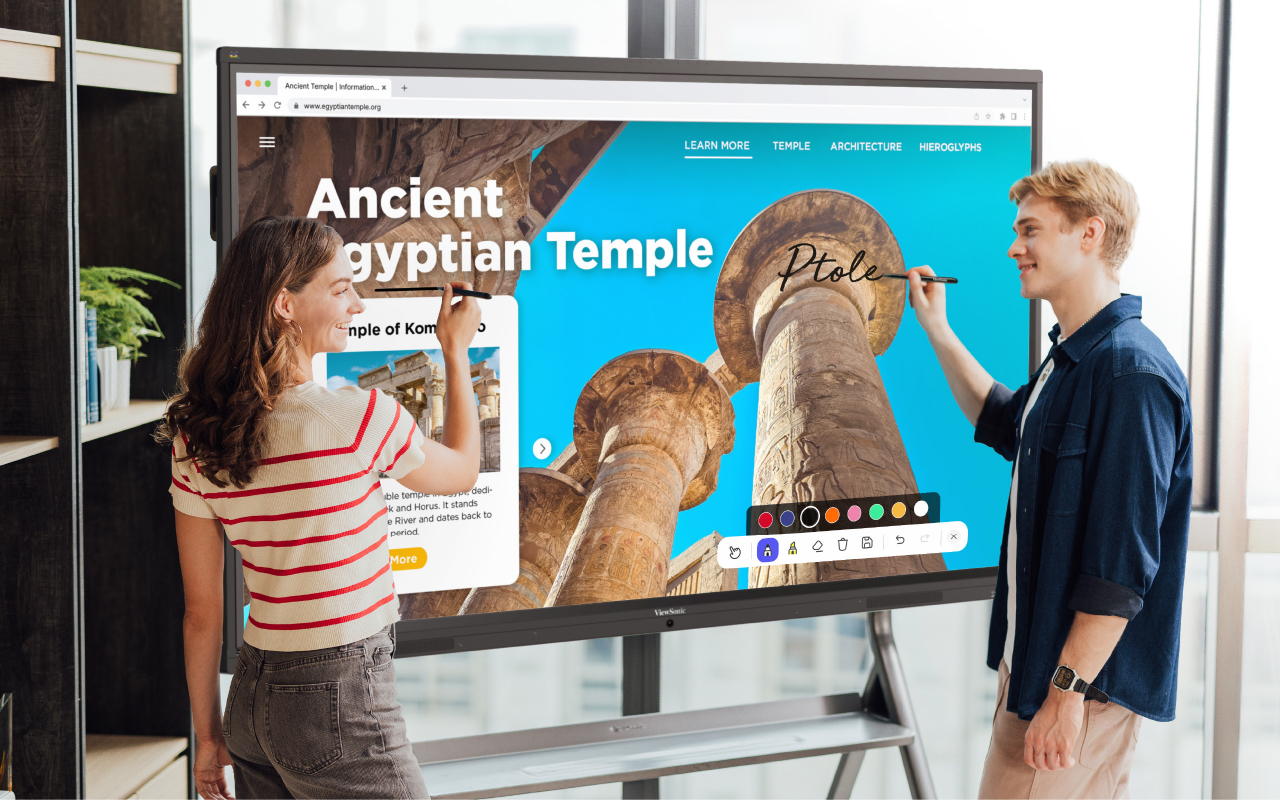
In our latest Community webinar, ViewSonic Professional Development Trainer, Enrique Hug, shared how educators can move from passive instruction to active student participation. The goal is to bring students to the front-of-class ViewBoard® interactive display to lead their own learning. With ViewBoard displays, the classroom becomes a collaborative hub rather than a teacher-centered lecture.

The 90% Problem: Why Interactivity Matters

Research suggests that in a traditional classroom, teachers tend to call on only 5% to 10% of students daily. This leaves 90% of the class sitting passively. While many teachers select popsicle sticks or ask for group answers, our strategy focuses on a better way. You can use the ViewBoard to engage that silent majority through tactile tools.

1. Participate Mode: The Engagement Multiplier

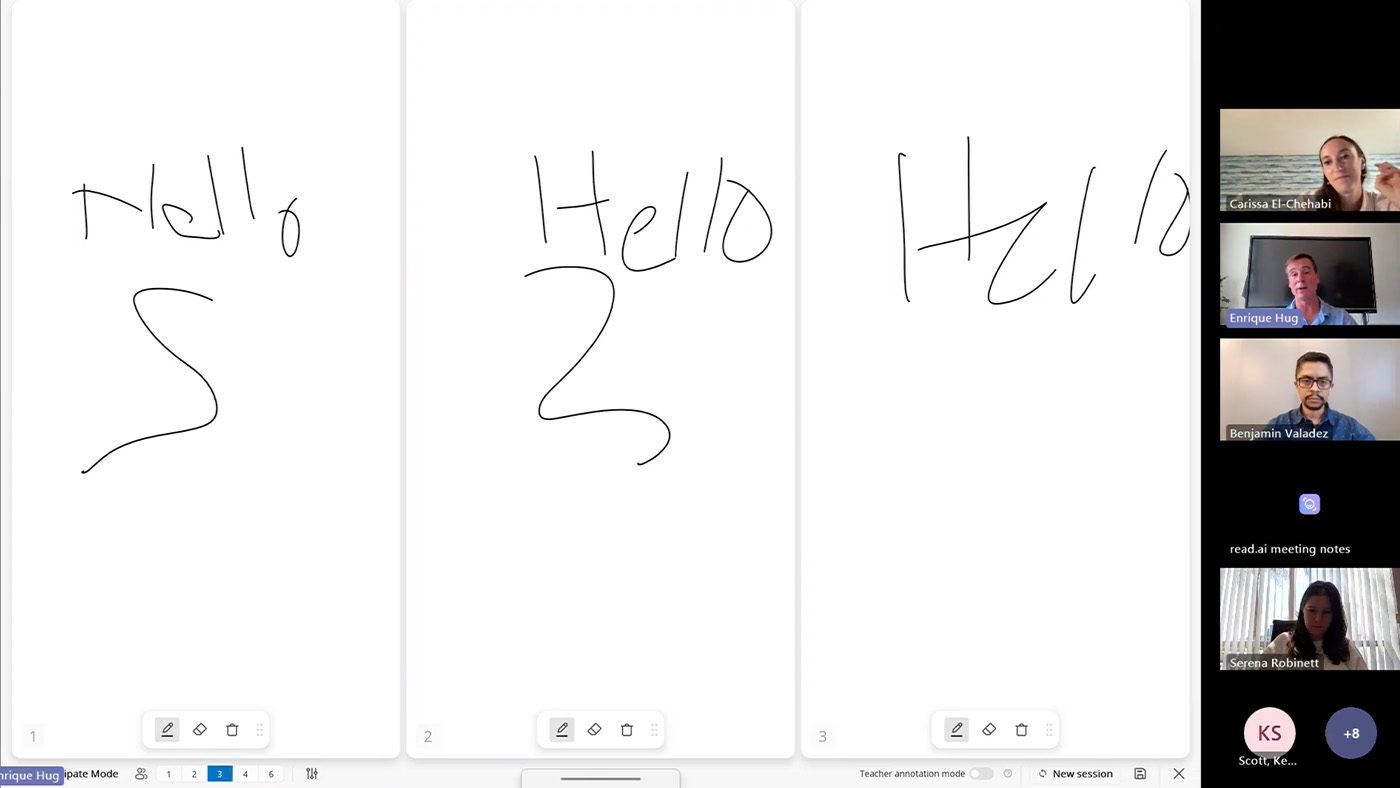
Why have one student at the board when you can have six? Participate Mode leverages the board’s 50+ point touch technology to create independent workspaces. This is one of the most powerful ways to turn a lesson into a hands-on experience.

  • Split Screen: Perfect for small group rotations or student-led modeling.
  • Exit Tickets: Quickly check for understanding by having group reps write answers simultaneously.
  • Independent Backgrounds: Set an XY-coordinate plane for one student and a world map

2. The Magic Box: Turning Math Into Manipulatives

One of the most versatile features of the myViewBoard whiteboarding software is the Magic Box. Itallows teachers to bridge the gap between abstract concepts and visual mastery by creating live math manipulatives in seconds. Here are just a few of the math features:

FEATURE CLASSROOM APPLICATION
DIGITAL DICE Generate numerators and denominators in real-time for probability or fraction lessons.
MATH FORMULA ASSISTANT A tool where users can write math formulas and symbols. Once finished, press insert to add it to the canvas as text.
TACTILE MASTERY Students can physically pull off a slice of a fraction to visualize the parts of a whole, making the learning kinesthetic.

3. Tailored Environments: Backgrounds That Work for You

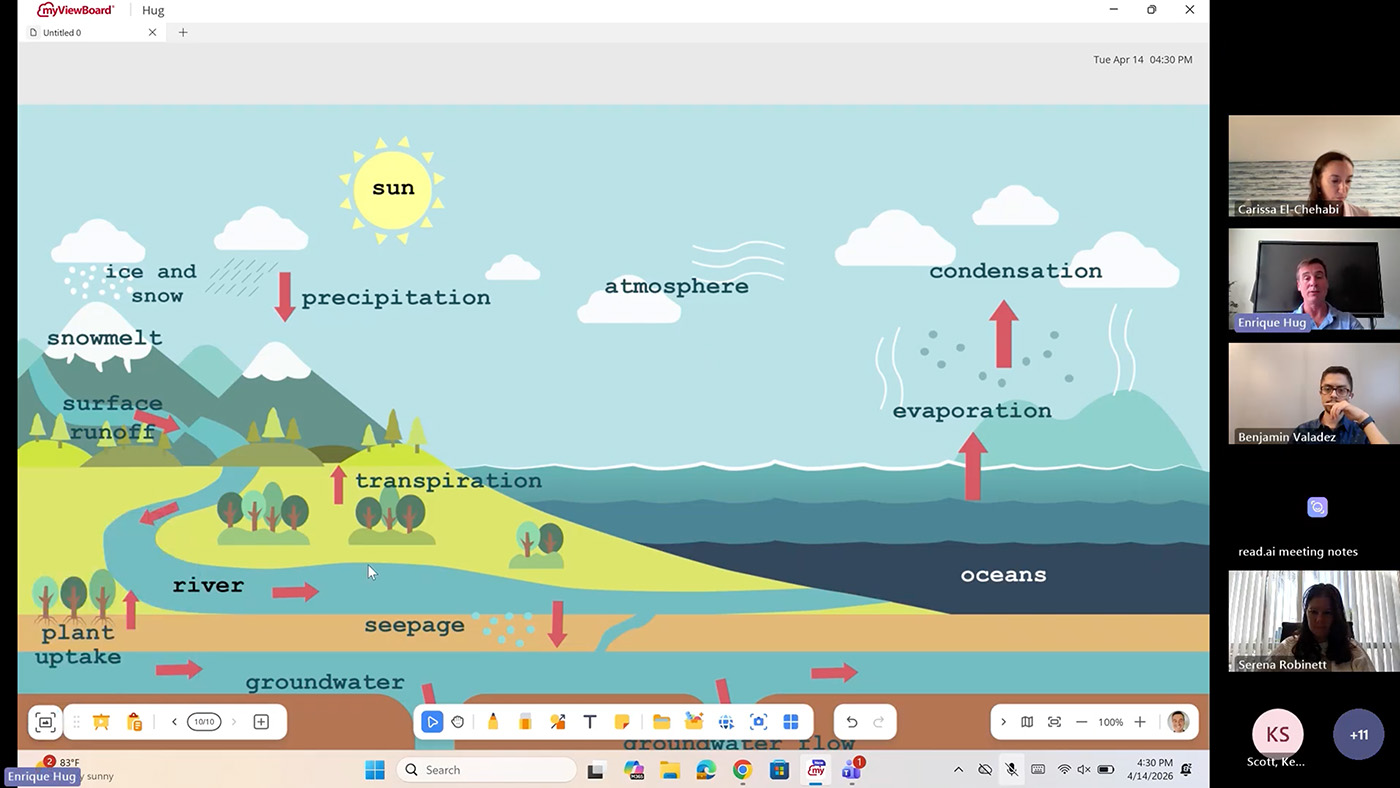
One of the most powerful ways to streamline your workflow is through Background Customization. Your ViewBoard display shouldn’t just be a blank slate; it should be an environment tailored to your specific subject and teaching style.

  • Curated Originals: Access a massive library of pre-made backgrounds. Find exactly what you need, from XY-coordinate planes and world maps to primary lined paper and musical staves.
  • The Favorite Workflow: You can favorite the backgrounds you use every day, ensuring your primary teaching tools are always one tap away. Log in and save your favorites here.
  • Full Customization: You can upload your own custom PNGs or JPEGs directly to your cloud-connected folders. Whether it’s a specific graphic organizer or a school-branded template, your ViewBoard display works exactly how you work.

Empower Your Students

The true power of a ViewBoard display isn’t in what the teacher can do with it, but in what the students can discover through it. By shifting the focus toward student-led interactivity, students become active participants who look forward to coming to class every day, eager to see what they will create next on the board.

Watch the entire webinar here:

ViewSonic Educator Community

The ViewSonic® Educator Community is an interactive and collaborative forum designed to inspire and connect you with fellow educators from around the world. When joining our community, educators can share their own creativity and ideas, leverage the expertise of others, and gain new friends. It’s collaboration and growth at its finest.

Join Now

Community Webinar Recap: 3 Dynamic Ways to Level Up Whiteboard Content

Community Webinar Recap: 3 Dynamic Ways to Level Up Whiteboard Content

The myViewBoard® ecosystem is designed to be more than just a blank space. It’s a true hub for interactive learning! In a recent ViewSonic Community webinar, professional development trainer Carissa El-Chahabi showed us how to move beyond basic annotation. She demonstrated exactly how to transform your canvas into a rich multimedia experience.

Here are three powerful ways to bring your lessons to life.

1. Direct File Imports

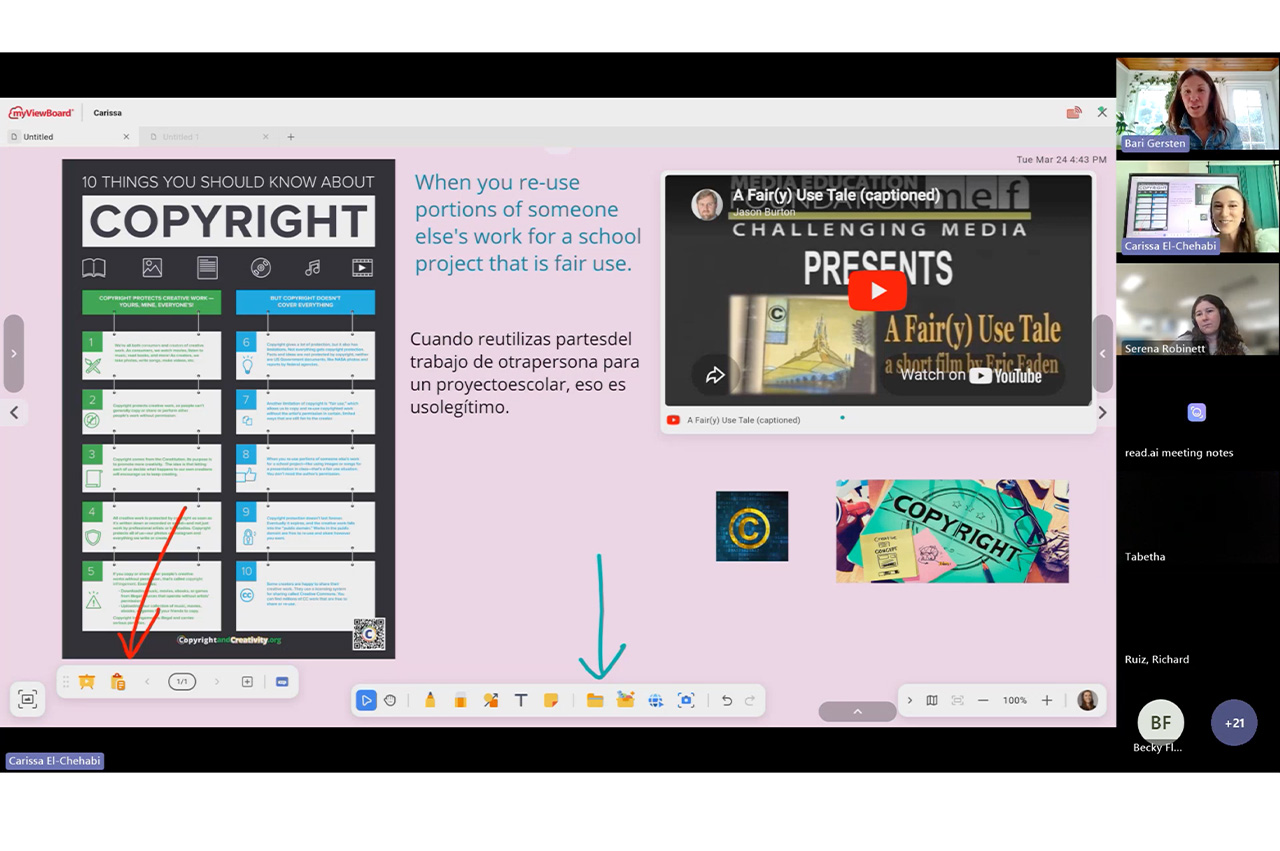
There is no need to reinvent the wheel when planning your week. If you have existing resources saved as Google Docs, Promethean Flipcharts, Smart Notebook files, presentation slides or PDFs, you can open them directly inside your session.

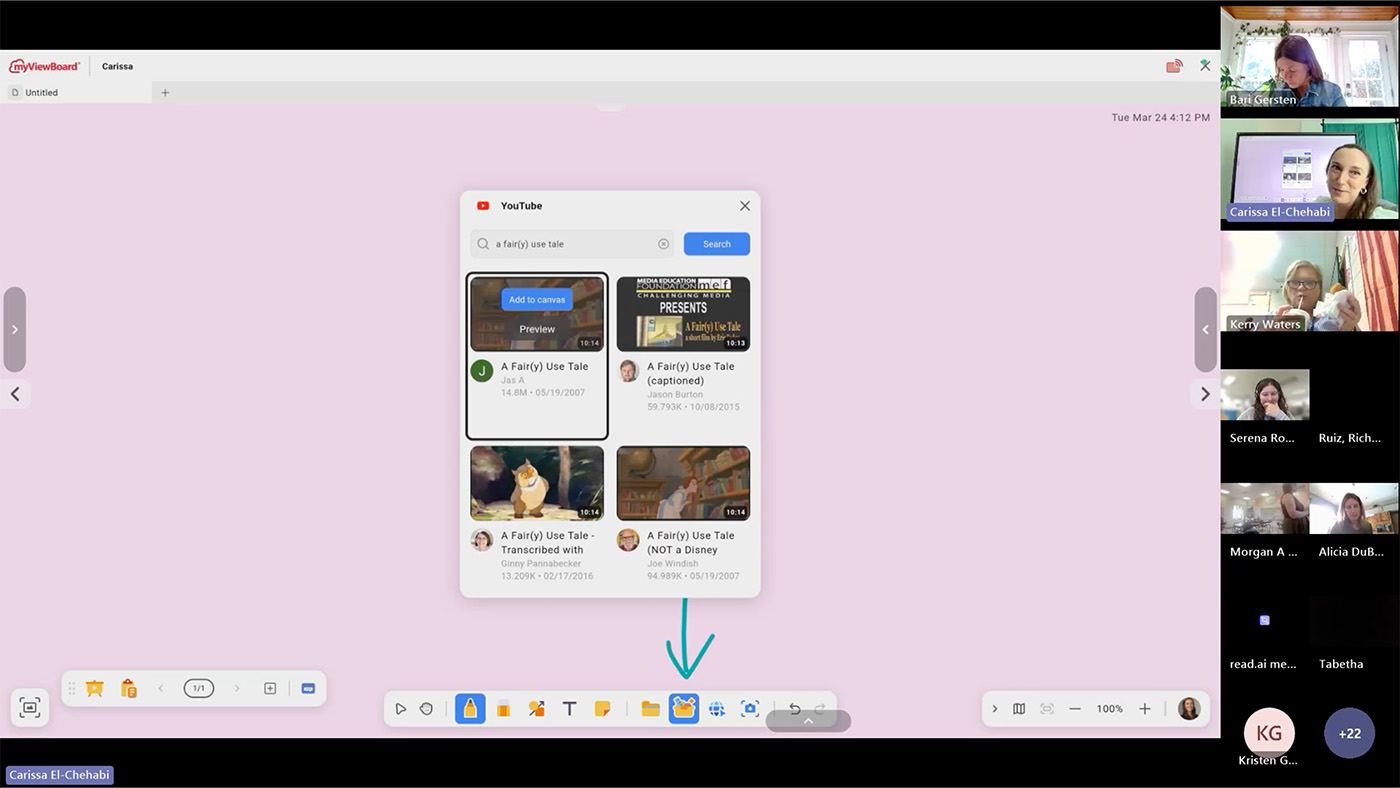
2. Magic Box: Seamless YouTube Integration

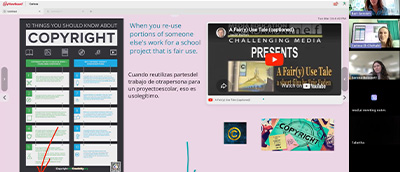
Stop fumbling with browser tabs and distracting web links. The Magic Box allows you to search for and embed YouTube videos directly onto your canvas.

Why is this a game changer? It automatically skips all those annoying advertisements. This keeps the classroom focus entirely on your curriculum. Because the video is embedded right into your file, you never have to leave the myViewBoard environment to hit play.

3. Magic Box: Integrated Image Search

Need a quick diagram of a plant cell or a high-res photo of the Colosseum? You can search and add images without having to go to the web or save on your computer.

Once you drop an image onto the canvas, our adorning menu gives you instant control. You can freely resize, crop or lock the image in seconds to fit your lesson layout perfectly.

Keep Learning With Us

We are always sharing new ideas and helpful tricks to make teaching easier. Ready to see these digital whiteboard features for yourself?

Watch the entire webinar here

Want to learn more from our experts? Join the ViewSonic Educator Community.

K-12 Summer IT Checklist for ViewBoard Interactive Displays

K-12 Summer IT Checklist for ViewBoard Interactive Displays

Everything K-12 IT admins need to close out the year: ViewBoard maintenance, firmware updates, staff accounts and summer planning in one guide.

K-12 End-of-Year IT Checklist:
Managing ViewBoard Interactive Displays and Campus Devices

For K-12 IT administrators, the end of the school year is the best opportunity you’ll have to ensure your campus is ready for the fall.

Because active instruction has paused, every task you complete eliminates a potential first-day emergency in September.

This guide outlines exactly how school IT admins can close out the year, optimize ViewBoard® interactive displays and ensure back-to-school readiness.

Plus, because you can complete most of these tasks remotely through ViewSonic Manager™ or Manager Advanced™, you can run your entire end-of-school checklist from a single screen.

Summer IT Maintenance Checklist At a Glance

The following checklist outlines your core priorities and the tools required to execute them before the new school year begins:

MANAGER (free)
Task Tool Priority
Encourage teacher lesson backup myViewBoard High
Panel cleaning and accessory audit On-site High
Enroll new devices On-site / ViewSonic Manager High
Update ViewBoard firmware ViewSonic Manager High
Push app updates ViewSonic Manager High
Remove/add staff accounts ViewSonic Manager High
MANAGER ADVANCED (paid)
Task Tool Priority
Audit remote access credentials Manager Advanced High
Security review Manager Advanced High
Power down unused displays Manager Advanced (automated) Medium
IN-PERSON
Task Tool Priority
Meet with ViewSonic representative ViewSonic VIP Program Medium
Plan professional development ViewSonic Professional Development Medium

Why Summer IT Maintenance Matters

In school IT, deferred maintenance behaves almost exactly like interest: it compounds into massive tech debt by September.

Addressing these tasks over the break means fewer surprises when teachers and students return in the fall.

How ViewSonic Manager Can Help IT Admins Prepare for Summer

ViewSonic Manager is a free, cloud-based device management platform that lets IT admins access, monitor and maintain their district’s ViewBoard® interactive displays from any browser.

Instead of dealing with displays individually, you can use the platform as a secure, centralized command center to control your entire fleet.

For school districts with larger deployments, the upgraded Manager Advanced tier adds automated job scheduling, device profiles and remote desktop access to handle bulk summer workflows without manual intervention.

If you haven’t already, enrolling your displays in ViewSonic Manager is one of the easiest ways to speed up and simplify every other task on your summer checklist.

On-Site Tasks: Checking Hardware Before the Break

A physical walkthrough before summer begins is the most effective way to protect your district’s hardware investment.

Addressing basic classroom wear now prevents minor physical issues from ballooning into expensive hardware replacements in the fall.

Clean and Inspect Every Display

  • Wipe screens and frames with a soft, dry microfiber cloth. Avoid harsh chemicals because they permanently ruin specialized anti-glare coatings.
  • Examine the physical mount, secure loose cables and inspect the connection ports for damage while standing at each panel.

Complete Your Accessory Audit

  • Locate and test every stylus, remote control and cable in each classroom to verify they are present and functioning.
  • Log any missing or damaged accessories immediately so you can place replacement orders early to avoid late-August shipping delays.

Enroll Any New Devices Immediately

  • Enroll newly received ViewBoard displays into ViewSonic Manager or Manager Advanced using a PIN, serial number or QR code.
  • Use the batch enrollment feature to streamline mass setups and bring your entire inventory under centralized control.

Remote Management:
What to Handle Through ViewSonic Manager

Once your physical walkthrough is complete, you can use ViewSonic Manager to handle the rest of your summer checklist.

Update ViewBoard Firmware

  • Review the status of your fleet and prioritize keeping firmware up to date.
  • Deploy updates for ViewBoard interactive displays manually or schedule automated installations using Manager Advanced.
  • Run these updates while classrooms are empty to avoid interrupting active classes.

Push App Updates Across All Devices

Update Your Staff Accounts

  • Revoke directory access for departing staff and pre-create accounts for incoming staff to prevent configuration delays.
  • Configure custom and role-based access permissions to ensure consistent access to devices and features in Manager Advanced.

Back Up Your Manager Console

  • Back up your ViewSonic Manager console before making bulk changes by navigating to Settings and selecting “Back Up and Restore.”
  • Maintain backups before and after major directory updates to secure your custom device groups.

Power Down Unused Displays

  • Scheduling power-offs can help cut utility costs and preserve backlight lifespans.
  • Instead of manually shutting down individual displays, save time by using ViewSonic Manager Advanced to apply shutdown rules to all panels or to specific groups based on usage.

myViewBoard Tasks:
Accounts, Subscriptions and Cloud Storage

Your physical ViewBoard interactive displays and myViewBoard® whiteboarding software function as a connected system. Managing your cloud environment now prevents access issues when teachers begin developing curriculum, creating lessons and collaborating on classroom activities.

Confirm myViewBoard Access

  • Verify that your school or district has active myViewBoard access. Entity accounts receive free access and do not require renewal.
  • Confirm that all accounts are set up and accessible before teachers begin lesson planning for the new year.

Verify Staff Accounts

Encourage Teachers to Back Up Their Lessons

  • Instruct teachers to back up important lessons and instructional materials to myViewBoard cloud storage.
  • Protect localized data from deletion during summer system resets or hardware replacements.

Device Lifecycle Planning:
Putting This Year’s Data to Work

The post-semester break is the ideal time to audit your hardware using ViewSonic Manager utilization reports.

By providing clear performance metrics on screen times, app usage and system uptime, this data helps you pinpoint underutilized displays and catch failing hardware early.

Use these insights to build a proactive, budget-conscious replacement strategy, and review them with your ViewSonic representative.

Setting Up the Next School Year

Decisions made now determine how smoothly your next deployment begins.

Target Professional Development

Audit support tickets to identify which teachers struggled with interactive display features this year. Use these insights to coordinate targeted training sessions with the ViewSonic Professional Development team instead of generic onboarding programs.

Teachers and education professionals can also join ViewSonic’s complimentary Educator Community to get access to free community webinars as well as certification courses.

Review Your Fleet Strategy

Schedule a planning session with your ViewSonic representative to go over hardware performance and plan out your refresh roadmap.

Run a Final Remote Readiness Check

Perform a quick remote audit through ViewSonic Manager and Manager Advanced before buildings reopen. Verify that firmware is current, display profiles are correctly assigned and all panels are online.

Looking to Make Device Management Easier?

ViewSonic Manager and Manager Advanced™ are enterprise device management solutions that can help automate routine maintenance, schedule updates and provide remote desktop support.

Right now, schools can try Manager Advanced free for 30 days.

Start your free 30-day trial

Frequently Asked Questions

What should IT admins do at the end of the school year?

K-12 IT admins should complete a physical hardware walkthrough, update ViewBoard firmware and apps, clean up staff accounts, back up their Manager console and review cybersecurity compliance. Most of these tasks can be handled remotely through ViewSonic Manager or Manager Advanced without leaving your desk.

How do schools manage devices over the summer?

Schools using ViewSonic Manager can handle firmware updates, app installs, power scheduling and account management remotely from a single web-based control panel. Manager Advanced adds automated job scheduling for teams managing larger fleets.

What’s included in the school IT checklist?

A complete K-12 end-of-year IT checklist covers hardware inspection, accessory audits, firmware updates, app updates, staff account management, data backups, cybersecurity review, device lifecycle assessment and back-to-school readiness planning.

How do you prepare classroom technology for next year?

Start with a physical inspection of all displays and accessories. Use ViewSonic Manager and Manager Advanced to update firmware, push app updates, clean up staff accounts and schedule power-offs for unused devices. Finish by pulling lifecycle reports and then meet with your ViewSonic rep to plan any deployments or refreshes before fall.

What is ViewSonic Manager and is it free?

ViewSonic Manager is free web-based device management software included with every ViewBoard interactive display. It allows IT admins to monitor and manage displays remotely across an entire district. Manager Advanced is an upgraded subscription tier that adds automation, device profiles and remote desktop access.

Ready to Make Next Year Your Smoothest One Yet?

Talk to a ViewSonic Education Expert to review your current setup, discuss your summer priorities and build out a school technology plan designed around your district’s needs.


Programs, pricing, specifications and availability are subject to change or cancellation without notice. Actual performance, compatibility and user experience may vary depending on system configuration, network conditions, usage environment and other factors. Selections, offers and programs may vary by country. Corporate names and trademarks stated herein are the property of their respective companies. Copyright © 2026, ViewSonic Corporation. All rights reserved. 6/26 [26ALL-EDU1359]

The Easy Button Universities Want: Improving Higher Ed AV Adoption

The Easy Button Universities Want: Improving Higher Ed AV Adoption

Professors want to walk into a room and have the tech be completely ready. According to the 2026 EDUCAUSE Students and Technology Report, students want their instructors to use technology efficiently and creatively. They actually feel a negative impact on their learning when they experience tech failures like broken projectors or watch instructors struggle to navigate systems. It is imperative that university technology is straightforward, easy to use and highly reliable from the very start.

Seamless Tech Integration

How do these displays connect to the campus? We designed our displays to work flawlessly with the control systems you already use. Because our products connect with RS-232, we easily integrate with industry leaders. ViewSonic® displays integrate into the Q-SYS Ecosystem via a Q-SYS library verified plugin. They are also fully compatible with Crestron, Extron and AMX.

This broad compatibility lets your IT team manage key functions like power, volume and inputs from one central spot. You get a simple setup that makes it easy to expand your system whenever you are ready.

The Power of Launch Commands

Can I launch software with a single button? Yes! Control system launch commands turn complex systems into simple one-touch experiences. A single button on the lectern removes hesitation and reduces support calls.

Even our software like myViewBoard® and AirSync™ can be launched using discrete commands on those command centers. This is a meaningful differentiator versus competitors that require manual navigation. It keeps the focus exactly where it belongs.

Benefits for the Entire Campus

How does this improve the classroom experience? The benefit of our products that work with control system launch commands is huge for your entire ecosystem.

  • IT teams do not need new systems or proprietary software from other companies.
  • They can use the exact control systems they are used to and have already implemented.
  • Instructors are actually going to use the tech and teaching becomes much more efficient.
  • Professors can focus entirely on the content instead of fumbling with the tech.
  • Classes move forward without annoying tech issues and students are far more satisfied with their learning.

Compatible Display Solutions

What products work with my control system? We offer a wide variety of products that cater to every instructor’s needs. All of these solutions work perfectly with major control systems like Q-SYS, AMX, Crestron and Extron.

Additional Tools for Instruction

How else can we improve the teaching experience? Beyond large room displays, we offer incredible solutions that help professors stay engaged with their students without worrying about the tech.

  • Podiums: The ID2456-4K touch display ensures instructors don’t turn their backs on students when they present.
  • Software: Tools like myViewBoard software for lectures or AirSync for wireless screencasting make digital sharing a breeze.

Simplify Your Campus AV Setup

Are you ready to upgrade your university displays? Upgrading your campus hardware shouldn’t mean rewriting your entire IT playbook. By choosing displays that respect your existing control systems, you create a stress-free environment for everyone.

Contact our team today to request a demo and explore our complete lineup of higher education display solutions!

Why Teachers Love Split Screen on ViewBoard® Interactive Displays

Why Teachers Love Split Screen on ViewBoard® Interactive Displays

Planning a district refresh? The ViewBoard® IFP41 series of interactive displays offers a Split Screen function that educators can’t get enough of. With Split Screen, teachers can show two sources at once. That means less time navigating between tabs and more time actually teaching.

Teaching requires juggling a dozen tasks at once while trying to keep 30 kids focused. This tool makes the ViewBoard a great SMART Board or Promethean alternative. It works the exact way a teacher thinks.

What Makes Split Screen a Game Changer?

With EDLA-certification, the ViewBoard IFP41 series of interactive displays seamlessly integrates with Google Apps to make multitasking easy. You can finally run two powerful applications side by side to keep your lessons flowing perfectly. It’s exactly what you want out of a classroom interactive display.

Brilliant Ways to Use Split Screen in Your Classroom

How are educators using this feature? Here are a few amazing ways this feature is being used in the classroom right now.

Content and Annotation

Can I write on my slides during a lesson? Yes! You can easily split your screen to show your Google Slides on one side with myViewBoard® software open on the other. This is the best interactive display for teachers who want to annotate and mark up their lessons in real time.

Real-Time Translation

How does split screen help English Language Learners? Using a ViewBoard IFP41 display with a built-in microphone, you can put your presentation slides side by side with Google Translate. This setup lets you translate your teaching into different languages in real time. That’s a massive help for English Language Learners.

Modeling and Research

Can I show my students how to take proper notes? The split screen setup is great for modeling how to read text and take notes. You can actively research a topic on one side and pull key ideas onto the digital whiteboard on the other. For example, nearly every teacher does some variation of opening Google Earth. If you live on a peninsula, you can pull up the map on the left side. Then you can use “peninsula” and “bay” as vocabulary words that you write on myViewBoard next to the image.

Visualizers and Wireless Tech

Does this work with document cameras and screen casting? Absolutely. You can use your visualizer on one side and have your slides or a web page open on the other. This is perfect for teachers who still rely on doc cams. You also have the amazing ability to cast screens with AirSync on one side while keeping your document or web page open on the other.

Preschool Engagement

Is this good for younger students? This tool works brilliantly for our youngest learners too. You can use a PDF with colorful shapes on one side and have the kids create those exact shapes on the other. It’s a really fun and interactive way of modeling for them.

Ready to Transform Your Classroom?

Are you looking for the perfect district refresh? The split screen feature eliminates technical confusion so you can focus on what you do best. It bridges the gap between complicated hardware and actual teaching needs.

Check out this video to see the Split Screen feature in action.

ViewSonic Launches Two New Laser-Based Installation Projectors

The LSD500HD and LSD600W Offer 3rd Generation Laser Technology, High Brightness, and Installation-Friendly Features for Commercial, Business, and Educational Environments


Brea, CA (May 13, 2026) – ViewSonic Corp., a leading global provider of visual and edtech solutions, launches two new laser-based installation projectors for commercial, enterprise, and education spaces. The LSD500HD and LSD600W projectors include third-generation laser phosphor technology, high brightness levels, and installation-friendly features, such as 360-degree rotation, for unique applications and settings.


The LSD500HD is a native 1080p, Full HD, 5,500 ANSI lumen projector that can run up to 30,000 hours (depending on usage) with its laser-based technology. It comes with a dedicated Golf Mode function that fine-tunes the color output to boost blues and greens on a screen. The LSD500HD features HDMI 2.0 with HDR10 and HLG support, so it can accept Ultra HD 4K content at 60Hz with no signal compromise. It is certified for Crestron and Q-SYS, and compatible with AMX, PJ Link, and Extron ecosystems, allowing AV teams to manage and monitor multiple projectors from a single location.  With its 360-degree projection rotation, 1.3x optical zoom, and horizontal/vertical keystone correction, the LSD500HD can fit practically any space and installation without compromising image quality. 


The ViewSonic® LSD600W is a laser projector with native WXGA resolution and 6,000 ANSI lumens of brightness. The third-generation laser technology ensures that it can last up to 30,000 hours (depending on usage). It is installation friendly with 360-degree projection rotation, 1.3x optical zoom, and horizontal/vertical keystone correction. A dedicated Golf Mode function fine-tunes color output to boost blues and greens on a screen. An advanced cooling system and sealed engine supports the LSD600W to run 24/7 in demanding environments. 


“With these new LSD laser projectors, ViewSonic can offer more lamp-free options to our customers, and the market, offering more value-based solutions to fulfill big display needs,” said Jeff Muto, Business Line Director at ViewSonic. “The LSD500HD and LSD600W were developed to power on to full brightness with no warm-up period, which is important in commercial environments. The installation friendly features also allow integrators to utilize these projectors mounted to ceilings, portrait modes, or any other type of unconventional space without losing image quality.”


ViewSonic LSD500HD

  • Native 1080p Full HD (1920 x 1080) resolution, and 5,500 ANSI lumens of brightness 
  • Third-generation laser phosphor technology
  • Dedicated Golf Mode function for fine-tuning of color output, boosting blues and greens
  • Installation-friendly with 360-degree projection rotation, 1.3x optical zoom, and horizontal/vertical keystone correction 
  • Certified for Crestron and Q-SYS, and compatible with AMX, PJ Link, and Extron ecosystems
  • Connectivity options include HDMI 2.0 (HDMI/HDCP 2.2), USB 2.0 (Type A), RJ45, RS232, and Audio-Out
  • Availability: May 2026 for an estimated street price of $1,049.99 [USD]


ViewSonic LSD600W

  • Native WXGA (1280x800) resolution, 16:10 aspect ratio, and 6,000 ANSI lumens of brightness 
  • Third-generation laser phosphor technology
  • Installation-friendly with 360-degree projection rotation, 1.3x optical zoom, and horizontal/vertical keystone correction 
  • Dedicated Golf Mode function for fine-tuning of color output, boosting blues and greens
  • Connectivity options include HDMI 1.4, HDMI/HDCP 1.4, USB 2.0 (Type A), RS232, and Audio-Out
  • Availability: May 2026 for an estimated street price of $999.99 [USD]


To find out more about ViewSonic, visit ViewSonic.com and follow on Facebook, YouTube,  X and Instagram.


About ViewSonic
Founded in 1987 and headquartered in Brea, California, ViewSonic is a leading global provider of visual solutions for the education, business, and consumer markets, with a presence in over 100 countries. Driven by the mission to transform education, workplaces, and lives, the company delivers a unified ecosystem of innovative hardware, software, and services that integrates seamlessly with the platforms, tools, and partners customers trust. Its product portfolio includes monitors, projectors, interactive displays, LED displays, commercial displays, video conferencing systems, and industrial solutions. Complementing its hardware is a robust suite of software offerings—including myViewBoard®, ClassSwift®, TeamOne®, ViewSonic Manager™, and AirSync™—featuring AI-powered tools for collaboration, device optimization, and management. By empowering creativity, collaboration, and lifelong learning, ViewSonic supports customers at every stage in achieving their business and sustainability goals, creating a lasting impact and helping people everywhere connect with purpose—and See the Difference®. Learn more at www.viewsonic.com.
#  #  #


* Actual performance, compatibility, and user experience may vary depending on system configuration, network conditions, usage environment, and other factors. Features and specifications are subject to change without notice. This news release contains forward-looking statements that reflect the Company’s expectations with regard to future events. Actual events could differ significantly from those anticipated in this document. Trademark footnote: ViewSonic and the ViewSonic trademarks are trademarks or registered trademarks of ViewSonic Corporation in the United States and/or other countries. All other corporate names and trademarks stated herein are the property of their respective companies.
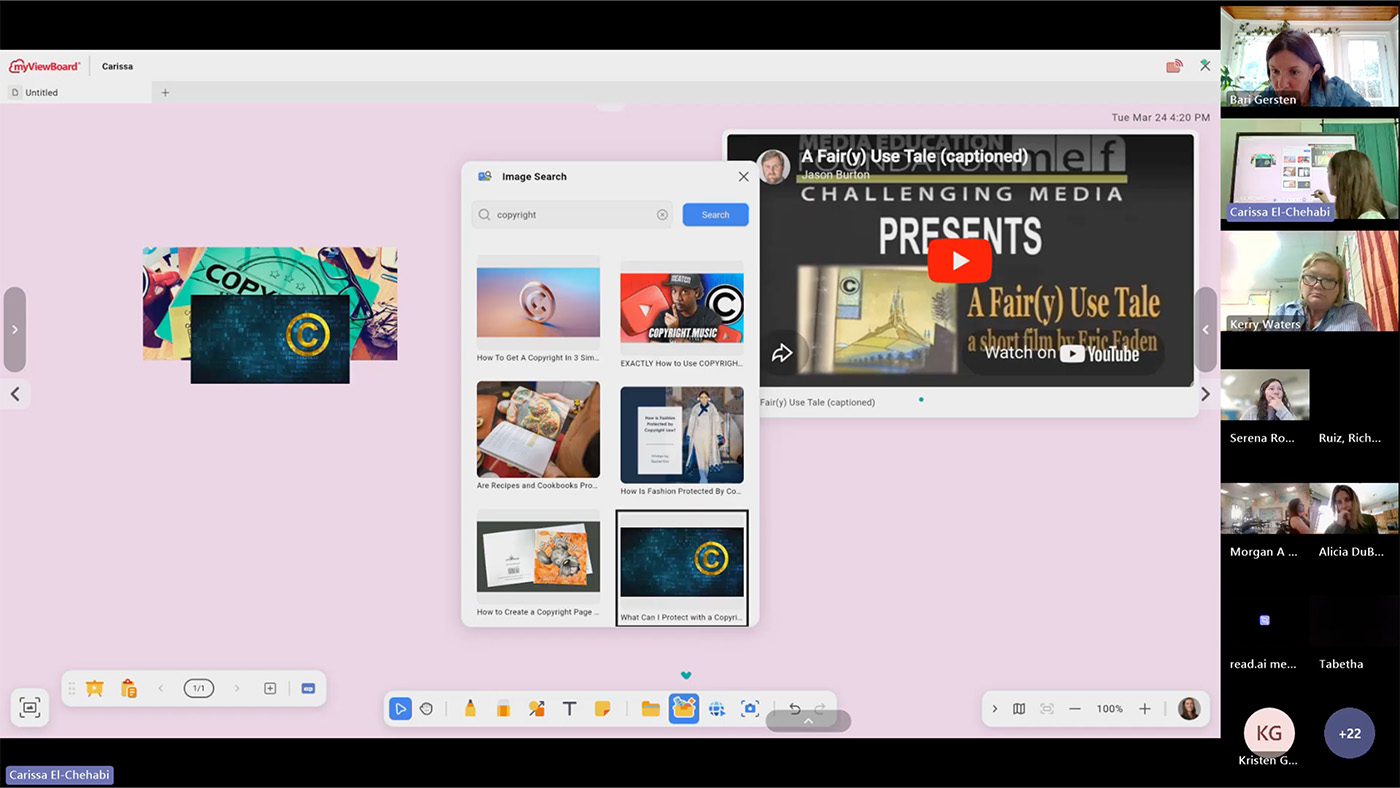

Media Contacts:

Joey Lee
JSL Marketing for ViewSonic [U.S.]
E: joey@jslcomm.com

Nury Lavandier
ViewSonic [Latin America]
E: Nury.Lavandier@viewsonic.com

Miranda Bravo
ViewSonic [U.S.]
E: miranda.bravo@viewsonic.com

Amplify Your Lessons: The Power of Interactive Displays with a Built-In Microphone

Amplify Your Lessons: The Power of Interactive Displays with a Built-In Microphone

Every laptop or phone you purchase has a built-in microphone. Even your car probably has one! We rely on these tools for a variety of everyday tasks. They help us record audio and seamlessly dictate text. Best of all, they prevent the need to purchase bulky external hardware.

So why should your classroom technology be any different? When searching for the perfect interactive display for schools, audio should not be an afterthought. At ViewSonic, we spend a lot of time listening to educators. We know that managing extra cables and external tech is a massive headache. That’s exactly why we built high-quality microphone arrays directly into our ViewBoard® IFP41 series of interactive displays.

What Is an 8-Array Beamforming Microphone?

ViewBoard IFP41 displays feature a powerful 8-array beamforming mic. Think of a traditional microphone like a flashlight. It usually only picks up sound from one specific direction.

The microphones on our interactive displays are much smarter than that. It uses eight microphones working together to listen to multiple directions. The system then automatically filters out annoying background noises like loud HVAC units or quiet classroom chatter.

Some competitors expect you to buy expensive external mic pods. Others force you to settle for low-quality audio. A standard mic might just hear the teacher. Our display hears the whole room

How Can Built-In Microphones Transform Your Classroom?

Having a powerful microphone changes the game for daily instruction. Here are a few brilliant ways you can use this technology right now.

Can I Record My Lessons Easily?

Yes, lesson recording is seamless. If you are running a Windows device with our myViewBoard® software, you can easily share your screen and record your entire lesson. It’s the absolute easiest way to create flipped classroom content. It’s also a fantastic tool to catch up students who were out sick.
How Does Audio Help ESL Students?

Integrated mics unlock real-time translation. For classes with English Language Learners, tools like Google Translate are a lifesaver. With the integrated mics on the IFP41, you can use the voice feature in real time. A teacher can speak directions at the board. A student can speak right from their desk. The ViewBoard microphone easily picks up both voices to provide instant translations.

Is There a Way to Type Faster?

Use your voice to dictate text. Typing long directions on a large screen takes too much time. It’s especially tough when you have 20 students waiting for a moment to get distracted. The myViewBoard software offers seamless speech to text. You simply dictate your directions and they instantly show up as text on the ViewBoard screen.

Can I Use AI With My Voice?

You can talk directly to your favorite AI tools. The IFP41 is fully EDLA Certified. This means you have instant access to any app on the Google Play store. You can easily pull up your favorite LLM like Gemini or ChatGPT right on the board. Instead of typing out complex prompts, use the microphone to ask questions or generate lesson ideas. It feels incredibly natural. It’s just like having a teaching assistant standing right there with you.

What About Remote Learning and Class Discussions?

Capture every voice in the room. A built-in microphone bridges the gap between in-person and remote students. You can hop into a virtual meeting and every single participant can hear each other clearly. This ensures everyone learns from different perspectives.

You can also record student discussions directly into a document. Instead of taking frantic notes, let the board do the heavy lifting. It’s a great way to gather evidence of student learning and keep a reliable record of class participation.
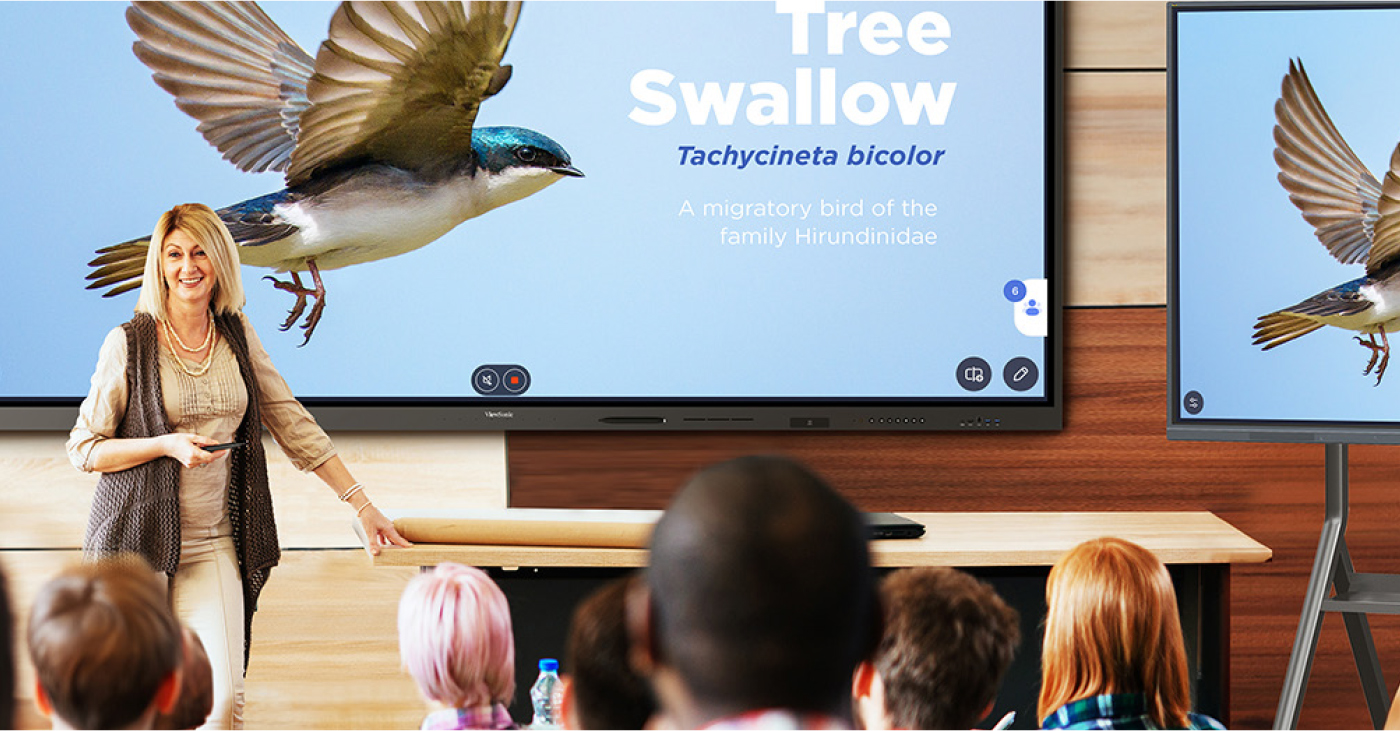
Ready to Upgrade Your Classroom Technology?

Why settle for complicated audio setups? You shouldn’t have to purchase additional mics and messy cables to do basic things like recording a lesson. The ViewSonic ViewBoard IFP41 series gives you everything you need right out of the box. It makes your teaching better and your life a little easier.

Want to learn more about how our hardware can transform your school? Check out our full lineup of interactive displays today!