 Teacher's Community
  Support
dvLED Install Gotcha #1: What Happens When Your Wall Isn’t Flat?
- Jul 30, 2026
BUYER'S GUIDE
dvLED Install Gotcha #1: What Happens When Your Wall Isn’t Flat?
Most Direct View LED (dvLED) installs don’t fail because of the technology. They fail because of the wall behind it.
Wall flatness is the first thing a dvLED install team should verify, and it’s the last thing many crews actually check before they show up on-site. Get it wrong and a one-day install turns into a two- or three-day rework job. The panels are fine. The wall was never ready.
This is the first in our series on the five most common dvLED install gotchas, and it’s the one that catches even experienced teams off guard.
What’s the acceptable flatness tolerance for a dvLED wall?
For a clean dvLED install, the mounting surface needs to be flat to a tight tolerance across the whole wall. A common target is around 5mm over the full surface. Go beyond that and you start to see the problems that make a wall look cheap: visible seams between modules, uneven pixel alignment and brightness that shifts from tile to tile.
Here’s the hard part. Walls that look perfectly flat to the naked eye fail this spec all the time.
Why does wall flatness catch installers off guard?
The problem isn’t that walls are obviously crooked. It’s that small imperfections add up. A slight bow in drywall, framing that isn’t consistent behind the surface, a little waviness in plaster or concrete. On a 4-foot section, nobody notices. Across a 20-foot display wall, those small deviations stack into a seam you can see from across the room./span>
There’s a money side to this too. Every client asks the same question before an install: how long will this take? If you quoted a flat wall and you find a bowed one on day one, your timeline and your margin both take the hit.
Discovering the problem on install day leaves you two options. Shim every mount point by hand, or build a substructure from scratch. Neither is fast. Neither is cheap. And both can delay installation by days.
How do you prevent flatness problems before install day?
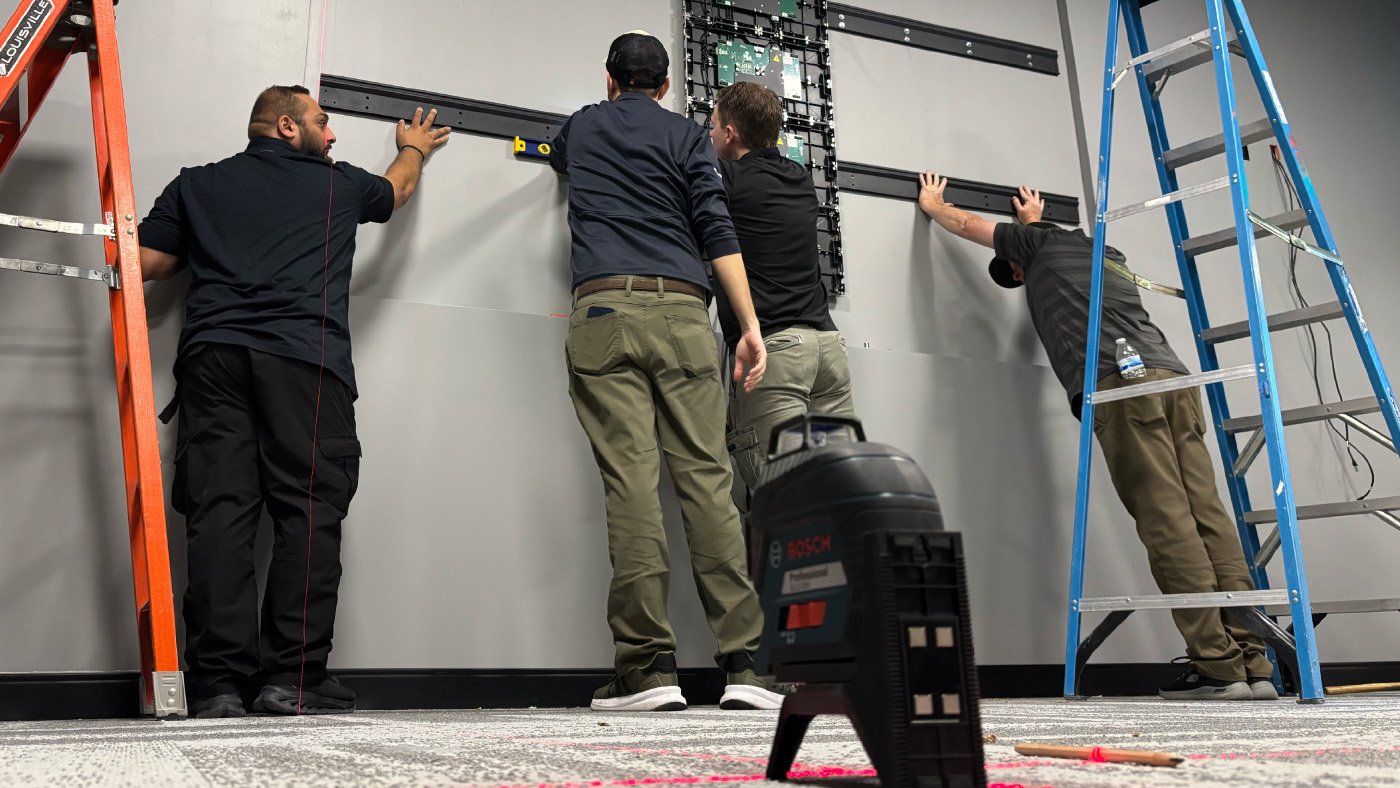
Measure the wall before install day, not the morning of. Run a laser level across the full surface, document every deviation and pick your correction strategy in advance. When you plan the fix ahead of time, it’s a task. When you find it live, it’s a crisis. If you cannot measure beforehand, assume the wall isn’t flat and start planning accordingly.
Set the standard with your client up front. Put the flatness requirement in writing, get structural sign-off and build correction time into the project plan instead of hoping your contingency budget covers it.
What belongs on your pre-install flatness checklist?
Keep it simple and do it every time.
First, confirm the wall type and construction. Then laser-level the full surface and log any uneven spots. Compare those numbers against your flatness specs. You should choose your correction method, like shims or a substructure, well before install day.
Don’t forget to get written structural sign-off from the client.
If you can’t check the wall ahead of time, assume it isn’t flat. Prepping early keeps you from facing costly delays on install day.
Frequently Asked Questions
What flatness tolerance does a dvLED wall need?
Most dvLED installs target a flat mounting surface within 5mm across the full wall. Beyond that, you risk visible seams, uneven tile alignment that can’t be fixed once the panels are mounted.
Can you install dvLED on drywall?
You can, but only if the drywall surface is flat within tolerance and the structure behind it can carry the load. Install on the studs behind the drywall and use plywood backing if you need a continuous mounting surface. Many walls need shims or a substructure to hit the flatness spec. Always verify with a laser level before install day.
Get certified before your next install
Want to build the habits that separate fast, profitable installs from expensive rework calls?
The ViewSonic® dvLED Certification Program is a hands-on, two-day course led by ViewSonic Solutions engineers. Graduates earn CTS and CTS-I renewal units. It covers pre-install checklists, structural planning and real-world field techniques. Reserve your spot today.


Login and Registration Form